You can surprise your loved ones with cards and crafts of incredible beauty using modern scrapbooking technology. For your work, you will need decorative materials, special paper and tips from this article.
Any holiday is certainly accompanied by congratulations and gifts, which, in turn, can be large or small. On the New Year, we strive to wish a happy life to all our loved ones and family. Often for this purpose people buy postcards, write letters and choose surprises.
But what if you move away from the usual canons and try to independently “figure out” something beautiful with your own hands, capable of congratulating a person on the holidays and giving him pleasant emotions? Such an interesting technique will help in this matter as scrapbooking.
Example of New Year's scrapbookingIMPORTANT: Scrapbooking is a handicraft that involves working with special scrap paper(paper with drawings and patterns) and other materials for creativity: beads, ribbons, lace, seed beads, rhinestones, buttons, braid, brushwood, canvas fabric, threads, felt, cardboard, candied fruits, dry leaves and much more.
This technique helps create crafts of incredible beauty: postcards, Christmas tree and wall decorations, albums, chocolate bowls, paintings. Each work can be used as a separate gift or part of a holiday package.
All materials for creativity, as a rule, can be purchased at the store or prepared yourself(if we are talking about natural materials: twigs, leaves, acorns, dry berries and fruits).
Before work it is important:
- Stock up on the necessary amount of materials for creativity.
- Have a dense base from which your product will be made: cardboard, paper, felt, plywood, and so on.
- Have hot glue, rubber glue or instant glue - this is the only way to attach each part to the base.
- You should start working only when you have imagined the future product in your head. Use a rough draft, sketch, imagine and experiment on paper in order to get the most effective handmade work.
- Be careful while working, because the final result depends on it.
New Year scrapbooking ideas:
The most popular product using the scrapbooking technique is, of course, New Year card. It can be made not only in any size, but even in shape: rectangle, square, circle, herringbone, heart, and so on. As a general rule, you should choose papers with distinctive winter designs and patterns in green, red, blue and white colors.
 New Year card using scrapbooking technique
 Another beautiful and very useful thing made using the scrapbooking technique is chocolate maker! Not everyone knows and understands this postcard, but it represents something between a gift and a simple card. Visually it resembles packaging which needs to be opened. Opening it, you find a chocolate bar and congratulatory inscriptions.
IMPORTANT: Chocolate Girl is a useful postcard. With such a surprise you can not only congratulate, but also please. A tasty treat (congratulations) can be prepared for parents, loved ones, teachers, doctors, colleagues, friends, neighbors, guests.
Ideas for creating a New Year's chocolate bowl:

 New Year's chocolate maker
 Chocolate girl using scrapbooking technique
  Beautiful New Year's chocolate maker
  Postcard and chocolate bowl
 Another, no less popular product is Christmas tree decoration using scrapbooking technique. Here you can show your imagination and create a toy of any shape and complexity: Christmas trees, balls, stars, houses, hearts, snowmen and much more. In fact, there are a huge number of ideas for such creativity, and they all depend only on how many materials you have and what they are.
New Year's toys using scrapbooking technique:

 Christmas tree star using scrapbooking technique
 Christmas tree decoration using scrapbooking technique
 Christmas tree mitten using scrapbooking technique
 Christmas tree decoration using scrapbooking technique
 Box made using scrapbooking technique- another “sweetheart” and useful thing in the house. The basis for such a plywood box can be bought at a craft store or created independently using, for example, weaving from newspaper tubes. The resulting product can store absolutely everything: photographs, jewelry, cosmetics, sewing and much more.
 Christmas box using scrapbooking technique
 Album using scrapbooking technique- a beautiful thing that can serve as an “archive” for storing your photographs and personal notes. New Year's album often contains photographs of holiday celebrations year after year, descriptions of pleasant moments, postcards from loved ones. So you can create a real family heirloom with your own hands with treasures and memories.
 New Year's album using scrapbooking technique
 Wall decoration using scrapbooking technique- this is a very impressive New Year's decor that you can use to decorate your walls during the holidays. There are a lot of ideas for creating such decorations: advent calendars, paintings, photo frames, panels, collages, Christmas wreaths and so on.
Wall Decor Ideas:

 Christmas wreath using scrapbooking technique
  New Year's panel using scrapbooking technique
 Framed picture for the New Year using Scrapbooking technique
 New Year calendar using scrapbooking technique
 New Year cards - DIY scrapbooking: master class
There is no shame in congratulating both a child and an adult with a postcard made with your own hands using the scrapbooking technique. Handicrafts are very fascinating, and the voluminous and stylish decor literally fascinates with its beauty.
Ideas for creating New Year cards using scrapbooking technique:
For example, try to do very unusual New Year card with buttons. For the base you will need very thick cardboard. It can be a card in the form of a book or a simple one-sided card. Measure one centimeter from each edge and draw a barely noticeable thin line with a simple pencil - this the line along which the stitching should be made with thread.
For “sewing on paper”, use a thin canvas thread; if you don’t have one, replace it with regular white or brown thread. After stitching, visually highlight the center of the postcard. Here you should draw a schematic diagram of the Christmas tree in the stand with a pencil. Use a ruler to ensure your lines are straight. The final result is necessary outline with a thin felt-tip pen.
For decoration you should stock up a small number of small buttons of different diameters. How exactly to distribute the buttons and what color they should be is up to you to decide. You can completely hide the sketch or leave the outline of the tree visible. The painted Christmas tree stand can also be hidden with buttons or other material: fabric, colored paper, brushwood.
Each button should carefully attach with glue. This must be done in such a way that there is no excess smear of dried glue left - this will ruin the impression of your work. After the Christmas tree is completely completed, use a felt-tip pen or ink write a beautiful congratulatory inscription.
IMPORTANT: If your handwriting is not very beautiful and you cannot leave a calligraphic inscription, you can cut out the greeting from paper and also stick it on the surface of the card.
 Postcards with Christmas trees and buttons
 SECRET: If you want to create the effect of a sewn button on a card, then the stitches should be made before you glue the button to the surface.

 New Year's card "Christmas ball" with buttons
 New Year's card "snowman" with buttons of different diameters
  Miniature Christmas tree card with buttons
 New Year card with Christmas balls:
Every modern woman must have such a hygiene product as cotton pads. They can also be used to create New Year's scrapbooking. Prepare the base for the card - thick cardboard and craft paper. By combining colors, patterns and different types of paper, try to choose the most effective and beautiful background.
For decoration you will also need:
- Ribbons (thin)
- Cotton pads
- Rhinestones and beads
- Decorative snowflakes
The cotton pad can be smooth, or it can have patterns (such a pad looks much more impressive). It can also be decorated with pearl beads and rhinestones if desired.
On top of the attached scrap paper background, you should glue three ribbons hanging down (the toys will “hang” on them). A cotton pad is glued to the edge of the ribbon and the junction of the disc with the ribbon is decorated with a bow. The remaining space on the card can also be decorated with bows, snowflakes and rhinestones.

 Beautiful New Year card using scrapbooking technique with Christmas balls made of cotton pads
 Christmas card “Christmas ball” made using scrapbooking technique
 Ideas for other New Year cards using scrapbooking technique:

 Beautiful New Year cards
 New Year card with red satin bow
  New Year card with candied orange and cinnamon sticks
 New Year card with lace
 New Year card with beautiful three-dimensional decor
 Christmas backgrounds for scrapbooking: templates
New Year backgrounds- this is an important material that is definitely needed when working with scrapbooking techniques. You can buy this paper at an arts and crafts store. However, small towns often do not have such stores. In order not to waste time searching and save money when ordering materials online, you can print New Year's backgrounds on a printer.
The main condition in the printout is have bright printer colors, which could convey the shades as accurately as possible and high quality paper. In addition, you can buy colored cardboard at a stationery store and use it in your work.
New Year's backgrounds for printing and using scrapbooking techniques:

 Christmas background: colored snowflakes
  Christmas background: colored Christmas trees
 Christmas background: Christmas tree decorations
 Christmas background: gifts under the tree
 Christmas background: balls
 Christmas background: mittens
 Christmas background: white snowflakes
  Christmas background: Christmas tree decorations
 Christmas background: festive winter
 Christmas background: holiday trees
 Christmas background: tinsel
 New Year's lettering for scrapbooking: templates
Scrapbooking is a technique that has a variety of decorative elements and patterns for work. Some of them you can do yourself, in other cases you can use templates.
Scrapbooking Lettering Ideas
Original New Year's scrapbooking: ideas for creativity, templates for cutting
Texts for New Year cards: ideas for creativity
Of course, you can write heartfelt wishes to your family and friends by hand. But, at the same time, they also look very original and beautiful. written texts on scrap paper. These can be quotes and poems, wishes in prose.
You can print the texts on a printer, cut them out and paste them in your preferred location. Try to follow a certain color policy for the text, carefully cut and glue the texts to the base.
Texts with congratulations for New Year scrapbooking and cards: New Year text for scrapbooking
New Year scrapbooking, original ideas
Video: “Scrapbooking: master class. New Year card"

One of the important elements of the New Year holidays and Christmas celebrations are Christmas tree decorations. These are special decors that, since childhood, we have become accustomed to taking out on New Year’s Eve, looking at them, choosing the best ones for an elegant Christmas tree, and giving them to each other as gifts.
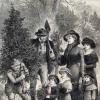
Making a toy with your own hands is an original way to decorate your home or create an unusual souvenir postcard. Select materials that are best suited for New Year's crafts and are associated with the winter holidays. The centerpiece of the composition will be cut-outs from vintage Christmas cards, which can be printed on a color printer.
Tools and materials
- Paper for scrapbooking with Christmas ornament, burgundy – 1 sheet
- Scrapbooking paper with Christmas ornament, dark green – 1 sheet
- Scrapbooking paper with a New Year's ornament and a bird, white and green – 1 sheet
- Scrapbooking paper with Christmas ornament and pine cone, light green – 1 sheet
- Beige paper for scrapbooking with Christmas ornament – 1 sheet
- White A4 paper – 2 sheets
- A4 red paper – 1 sheet
- Large and manicure scissors
- Set of colored pencils
- Ruler
- PVA glue
- A round object for drawing a template or a compass
- Glue brush
- Hot gun with silicone glue (or Moment glue)
- Printout with New Year's pictures
- Christmas tree cone made of paper
- Thin brown paper for making flowers
- Thin burgundy satin ribbon – 20 cm
- Thin brown satin ribbon – 20 cm
- White beads of medium size – 11 pcs.
- Large burgundy beads – 3 pcs.
- Branch with artificial white berries – 1 pc.
- A4 cardboard – 2 sheets.
- A stick (wooden skewer) for working with foamiran.
- Red foamiran – 10 x 10 cm


Step-by-step instruction
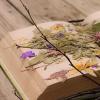
Trace a round object with a diameter of 10 cm on a sheet of white paper.

Above the circle, draw a small figure - a Christmas ball holder.

Trace the ball template onto a piece of cardboard.

Fold the cardboard in half and cut out the work piece so that you do not cut the bend. Trace and cut out another cardboard figure of the same type for the second Christmas tree decoration.

On a sheet of red paper, outline the cardboard piece with a curly border.

Glue the red sheet with the design onto a white sheet of the same dimensions, applying glue only to the corners of the sheets. Along the contour, cut out 2 blanks at the same time, red and white.

Trace the cardboard piece onto green patterned paper.

Cut out the green piece.

Glue the green cutout onto the cardboard base.

On the other side, glue a red blank with curly edges so that they look evenly on the front side of the product.

On paper with a pattern of pine cones, trace a paper template of a Christmas tree decoration.

Cut out the piece for the first inner side of the toy.

Carefully glue the patterned piece to the left side of the spread.

On white paper, trace the top of the paper template of the Christmas tree decoration, as shown in the photo. Draw a curly line.

Cut out the template. Trace it on burgundy paper and carefully cut out the piece.

Glue the burgundy colored element to the top left of the inner spread.


Place the large drawing on scraps of red and white paper glued together. Draw one curly edge from center to center of the design, fold the paper in half. Cut out 2 background parts for the picture at the same time - red and white.

Glue the white background piece to the right side of the inside spread.

Glue a large picture onto a white background.

Use a hole punch to make 10 snowflakes from green paper.

Glue snowflakes to the left and right of the picture.

Cut out small red circles and glue them to the top of the toy on each side.


Cut out small red circles and glue in the 4 corners of the picture.


Glue a burgundy rectangle on the right side of the front cover of the Christmas tree decoration, and a picture on top of it.

Draw a Christmas leaf template.

Cut out the template. Trace on light green paper. Cut out 2 identical parts and tint the edges with a green pencil.

Glue the leaves to the left of the picture.

Glue a sprig of Christmas berries between the paper leaves.

Tie a thin brown ribbon into a bow and glue it just above the bottom left corner of the picture.

On foamiran, squeeze out the shape of a leaf for a Christmas flower.

Cut out 5 identical sheets of foamiran and press the relief veins with a stick.

Glue the Christmas flower on top of the bow.

Glue 3 large red beads into the center.

Glue white beads in the corners of the picture and around the central red beads on the flower.

To make the second Christmas tree decoration, trace the cardboard piece onto beige patterned paper. Cut it out.

Carefully glue the white blank with curly edges to the cardboard.

Glue the beige piece with the ornament to the other side.

On paper with a bird pattern, trace a paper template for a Christmas tree decoration.

Cut out the bird piece for the first inside of the toy. Also trace the template for the top of this side onto the light green paper and cut out the second piece.

Carefully glue the patterned piece to the left side of the white spread.

Glue the light green element to the top left of the inner spread.

Glue the red figured background blank on the right side of the inner spread in the center.

Cut out 2 pictures from ready-made color templates.

Glue a large picture onto the red background.

Use a figured hole punch to make 10 burgundy snowflakes and glue them on both sides of the design. Cut out small white circles and glue in the 4 corners of the picture.

Use a sewing machine to stitch the edges of each piece in a circle on both sides.

Cut out a rectangle from burgundy paper with an ornament 6 mm higher and wider than the small picture.

Cut out a stem and oblong leaves for a branch from green paper.

Glue the green branch to the left side of the front of the toy.

Glue a burgundy rectangle on the right, and a small picture on top.

Cut a thin strip of thin brown paper.
Cut the strip into 2 parts. Roll into rose shapes. Glue a paper cone in the lower left corner of the picture, and roses on the sides.

Tie a bow from burgundy ribbon and glue it under the pine cone. Cut out small white circles and glue them to the top of the toy on each side. Glue white beads to the corners of the picture.

To hang the toy on the Christmas tree, all you have to do is make holes in the top cardboard tab and thread it through. A beautifully designed toy with Christmas motifs can be signed inside or a printout with a New Year's wish can be glued to the back of the product. To make the crafts even and look aesthetically pleasing, place them under a press overnight so as not to press the volumetric elements (a foamiran flower and a pine cone).


In the photo there is a beautiful Christmas tree toy using the scrapbooking technique for the year of the pig, which you can make with your own hands, following the master class.
By choosing other templates for the craft, you will get many different Christmas tree decorations or cards. This is also a wonderful gift for friends and colleagues. Bright little things can be placed in bags of candy or in bags with more substantial gifts. Everything created with love is valued more than money. Please your loved ones and enjoy handicrafts and creativity!
Materials for Christmas tree decoration
We would like to immediately note that we have a lot of crafts for the Year of the Pig. From a simple point of view, we recommend and.
To make a New Year's toy with a pig, you will need the following kit:
- paper white, red, green;
- scissors (stationery and manicure);
- a simple pencil and eraser;
- thin red textile tape – 6 cm;
- PVA glue;
- hot glue gun;
- thin twine;
- a piece of white guipure (or wide ribbon);
- gold beads – 3 pcs.;
- gold sequins – 3 pcs.;
- a piece of corrugated cardboard (or foam);
- white pompom – 1 pc.

Buy materials with a reserve to make another lesson on our website “Women’s Hobbies”.
Below is the color printing of elements and backgrounds for scrapbooking. Print the picture on a printer.

Step-by-step instructions with photos
Trace a round lid or glass on white paper. Or draw a circle with a compass.

Bend the sheet in half and cut out a double template for the Christmas tree decoration.

Trace one side of the template with a pencil, creating a wavy edge. Fold the sheet in half.

Cut out the wavy part. Use an eraser to erase any pencil marks.

Trace the white template onto green and red paper. Make two parts.

Glue the parts so that the wavy one is between the colored ones. Fold in half.

Trace the edge of the template onto the patterned paper. Glue the two parts at the top and bottom of the ball with PVA glue. Cut out a piece of guipure and place it in the center of the decoration on the Christmas tree.

Cut out elements of New Year's decor: two pigs, a candy stick, three rectangles for gifts, the inscription: “Happy New Year!” and a rectangular background for it.

Add a striped candy and a greeting message with a background.

Wrap thin twine around rectangular boxes (gifts). Glue the rope on the back side.

Add a white pom pom to the pig's hat. Glue together several pieces of corrugated corrugated paper. They will serve as the basis for creating volumetric effect. You can replace the cardboard with a foam cube. Glue the face onto the cardboard leg.

Glue on the gifts and the pig.

Cut out the background rectangle for second pig. Glue the background, pig and 2019 lettering inside the card. If desired, you can round the edges.

Cut out a heart from paper with a red ornament. Secure the textile loop with hot glue. On top is a heart. For a postcard in the shape of a New Year's ball, one loop is enough. If you want to hang the toy on the Christmas tree, make another loop in the same way on the opposite side.

Add gold beads and sequins and secure with hot glue.

This is such a bright toy for the Christmas tree that will result from the creative process.


Do you want to keep it? Then make a few more for gifts. There's still time!
A master class on preparing Christmas tree decorations for the Year of the Pig was prepared by Svetlana Filippova. Check out her sewing tutorials and...
Perhaps the most common form of Christmas tree decoration is a ball. Traditionally, the Christmas tree is decorated with balls of different sizes, but of the same color scheme, or, conversely, they take balls of the same size, but different colors that match each other. But every year it becomes more and more popular to make New Year's toys with your own hands. That is why we will learn how to make ball-shaped Christmas tree decorations using a variety of needlework techniques!
Balls made of beads, buttons and threads
One of the easiest ways to decorate New Year's balls with your own hands is to paste them with threads or decorative cords. To make the ball look more festive, take a string of beads along with the cord and glue them, alternating with each other.


Balls of buttons and pasta
Even children can glue colorful buttons onto balloons, and all you have to do is admire the result and help them a little if necessary)


And instead of buttons, you can glue pasta or coins, and you will get the most unusual New Year's balls with your own hands!
Wrap the foam or any other ball in gold foil to mask the gaps. Alternatively, after gluing the small parts, the entire ball can be painted with gold spray paint.

Balls of thread
Making balls from threads is also not at all difficult. An ordinary ball is taken as a basis (you can use an old Christmas tree decoration, from which, for example, the paint has peeled off in places) and wrapped with knitting threads. Show a little creativity and it will turn into a ball-ball! Knitting needles are made from toothpicks and a couple of wooden beads.

Another method is based on the use of a balloon, which is wrapped with threads smeared in PVA glue. You can wind the threads in any order, and at the end it won’t hurt to coat the entire surface with glue again.

After the glue has dried, pierce the balloon and carefully remove it, and decorate the finished ball of thread with a festive bow.

Paper balls
To make this cute paper ball, all you need is pretty paper and glue.

Felting balls is another interesting way to create a unique Christmas tree decoration with your own hands!
You can felt wool balls in two ways: one is called dry felting, and the other is wet felting) The result is equally good if everything is done correctly.
Painting balls
And finally, another simple way to decorate Christmas balls is painting. It is made using a gel with glitter of various colors.

Take a suitable color and draw whatever comes to your mind) By the way, involve children in this activity, they will be delighted!


We hope that from the variety of options offered, you will choose one or more suitable ones for yourself, and your Christmas tree will be decorated with exclusive handmade New Year's balls!
Happiness and creative success in the New Year!!!
CategoriesNew Year's scrapbooking is an interesting technique for making various crafts and decorative elements. With its help, it won’t be difficult to make a custom gift for the New Year holidays with your own hands.
This article is intended for persons over 18 years of age
Have you already turned 18?
New Year's scrapbooking: what is it?
Do you want to give your family and friends or work colleagues original gifts for the New Year, but don’t know how to do it? Take advantage of the scrapbooking technique, which is incredibly popular today. It is a type of handicraft that requires special tools, materials and decorations:
- scrap paper (decorative paper equipped with various ornaments and patterns);
- ropes (especially twine);
- tags, pieces of knitted fabric or jeans;
- rhinestones, beads, beads;
- bows and buttons;
- pictures and drawings (you can make them yourself, or you can print ready-made ones);
- multi-colored threads;
- cards and stamps;
- lace fabric and ribbons;
- templates and stencils;
- natural materials (dry leaves and berries, candied fruits, branches and acorns).
The success of the planned campaign depends on the availability and quality of selected materials. Therefore, to make your task easier, sketch out a list of necessary things and buy in advance what you lack.
Working in scrapbooking technique can create simple but very beautiful and spectacular crafts:
- postcards and paintings;
- albums;
- chocolate makers;
- Christmas decorations.
All this can be done in a close family circle. And gifts made by children's hands will certainly delight your family and friends.
Preparations for New Year scrapbooking 2018
Half of the success depends on the correct implementation of preparatory activities. Below are some tips that will be very helpful to you:
- First of all, you need to stock up on the equipment described above. If desired, it can be supplemented with your own elements;
- for the basis of the future product, it is better to opt for thick cardboard or plywood;
- To ensure secure fastenings, it is recommended to use instant glue;
- In order for the result to meet your expectations, we advise you to first sketch a sketch: looking at it will be easier to bring it to life;
- When working, you should behave as carefully as possible so as not to damage the craft.
So, if you are ready, then we can safely proceed directly to the work itself.

New Year cards using scrapbooking technique
Let's look at the basic rules and examples of creating simple, but very interesting cards for Happy New Year. They are perfect for both beginners and experienced craftsmen. To successfully create a holiday card using scrapbooking technique, follow these recommendations:
- do not neglect using a draft to create the primary composition (first depict your idea in a draft, and only then implement it in the finished product);
- for greater convenience, arrange materials and tools in front of you in the optimal order;
- when choosing a design, be guided by the taste preferences of the person to whom the gift is intended;
- if your handwriting is far from ideal, then it is better to refrain from various inscriptions on the front side;
- use stamps, cut-outs, die-cuts, or die-cuts for letters instead;
- be sure to leave some space on the inside of the card for writing wishes and congratulations;
- Be extremely careful and careful: do not allow liquid glue to spill, which can inevitably ruin everything, and then you will have to start work from the very beginning.

Postcards can be made in a wide variety of shapes (rectangular, round, square, in the shape of a Christmas tree or a snowman) and decorated at your discretion with ornaments and designs. Models in the form of shakers and tags will look quite unusual.
Now we present to your attention a small master class, which will tell you step by step how to make a New Year's card using the scrapbooking technique. This MK will outline the basic principles of design, which you can easily supplement with your own ideas.
We will need:
- multi-colored A4 cardboard;
- scrap paper of identical size;
- double-sided paper red and green;
- acrylic paint (white and red);
- red beads;
- beads and fishing line;
- threads (preferably white) or twine;
- liquid glue.
Instructions:

- fold the card paper in half;
- draw mittens or use a ready-made template: one pair of red ones and one smaller pair of white ones;
- make arbitrary strokes along the perimeter of the latter;
- glue white mittens on top of red ones;
- use a rope to make bows and attach them at the base of the mittens;
- for decoration you can make flowers or stars from paper (optional);
- cut 4 green strips 21×3;
- cut out a small strip from cardboard for the inscription “Happy New Year”, cover it with white paint, and red around the edges; wait until everything dries;
- string beads onto a fishing line (10-12 cm) and secure;
- from the left edge, at the same distance from each other, glue the prepared strips;
- We fasten the mittens to the right;
- We arrange the rest of the details at our discretion.
Postcards can be made in both large and mini format. As an option, you can use a pattern with Santa Claus, a Christmas tree or a deer. The design can be done in modern, classic, shabby chic, hi-tech, vintage and any other style.
Garlands and Christmas tree decorations are considered irreplaceable attributes and almost always occupy one of the central places in preparation for the New Year. The following master class will show you how to decorate ordinary Christmas balls using the scrapbooking technique:

- prepare plastic or glass balls (can be replaced with homemade blanks), acrylic paint, glue, spray, ribbons, lace, flowers, brushes and pliers;
- cover the balls with a layer of white paint, and the flowers with any color;
- let the pieces dry completely: to do this, you need to place them on skewers so that they do not come into contact with anything;
- We form bows from ribbons;
- Glue lace fabric, flowers and bows to the balls.
Such balls will not only be a wonderful decoration for your holiday tree, but also an excellent gift for your friends and family. When decorating, it is recommended to use all shades of the color scheme, except black: it will introduce a sad and tragic note that will not be in harmony with the surrounding atmosphere of celebration and fun.
New Year's scrapbooking chocolate makers
Festive decoration of a chocolate bar will be a great idea for a children's gift. The scrapbooking chocolate maker combines a card and a small box with a surprise. This gift will certainly please your friends with a sweet tooth. For a bright and colorful design, you can use stencils, templates or your own designs, and for the strength and reliability of the product, it is better to use good quality thick cardboard.
Christmas box using scrapbooking technique
This product, also known as a magic box or shadow box, is an alternative replacement for expensive souvenir bags. Making such a box will not be difficult, and the process of creating it will give you real pleasure. You can put an original gift inside (wristwatch, alarm clock, small candle, magnet) or simply fill the contents with candies or other sweets. And larger boxes are perfect for homemade gingerbread houses and handmade wreaths.
New Year scrapbooking photo album
This stylish mini-album, made in American style, contains many photographs, pictures and stickers reminiscent of happy moments in life. To make it more festive and elegant, you can decorate the product using multi-colored paper, canvas, synthetic padding, ribbons, bows, beads, as well as using panels and other decorative elements. By arranging all the components in random order, you can achieve a unique result that will be appreciated by the future owner of the gift. Such decoration will look no less impressive on a calendar or notepad. To complete the picture, the finished product can be wrapped in a spacious envelope.
Additional craft ideas and sources of inspiration can be found in your surroundings or on the World Wide Web.