Do you already have a child? Or are you just waiting for an addition to the family? Did close people have a daughter? For this flower of life, you can make a stylish charming headband as a successful start to the baby's journey in the fashion world! This article will teach you how to make a great baby or toddler headband that is completely customizable to your specific needs and style.
Steps
Taking measurements and preparation
- Babies are very fragile creatures that don't like to sit still, so taking measurements can be a bit of a challenge. If you have a measuring tape, use it to take measurements. Do not use metal tape measures, you can scratch the child, and the measurement will not be very accurate. If you don’t have a centimeter tape at hand, take a soft rope and measure the circumference of your head with it, and only then determine the resulting length with any measuring device.
- If the baby is not nearby or has not yet been born, you can rely on the standard size charts. They can be found on the Internet. Try to find them on sites and forums dedicated to sewing and needlework. It may also be possible to measure the head circumference of another child of similar size and age.
-
Decide on the dimensions of the product. You need to decide what the width of the product should be. It largely depends on the size of the child who will wear the bandage, since a bandage that is too wide will not be able to keep well on the head and will slip. A bandage wider than 1 cm is unlikely to fit a newborn. A child 6-12 months old will probably be able to wear a bandage up to 2.5 cm wide. A bandage up to 5 cm wide will suit a preschool child.
- Before making a decision, you can check your estimated measurements. Try cutting a strip of the required width from unnecessary fabric and visually imagine if this width will fit; or you can try on ready-made store bandages for your child to choose the right width.
-
Pick up materials. The materials needed depend on what type of dressing you want to make. Since children have soft, delicate skin, stretchable, soft materials are best. Stretch knitwear, corduroy or lace are best for babies. The basis of the bandage should be made of this material. There are more options for jewelry as they won't be in such close contact with the baby's skin.
-
Cut out the material. Having picked up the fabric, it will be necessary to cut it. Knitted material must be cut with a double width so that it can be sewn with a tube. If you take stretch lace, then doubling the width is not required.
- For knitwear, corduroy and other dense fabrics, you will need to cut a long rectangle from which the tube will be sewn. First, cut off the desired length (using the previously measured head circumference), remembering to throw 1 cm from each edge for a seam allowance. Then cut off twice the width, also throwing seam allowances. Seam allowance must be done on each side.
- Use the necessary tools. Tailor's scissors are necessary for cutting fabric, as ordinary blunt scissors lead to an uneven, ugly cut of fabric.
-
Cut off the rubber band. Using your child's head measurement, cut the elastic to the same length. Do not shorten the length of the elastic to create a snug fit for the headband, as some of the length will go into the seam, and you need to maintain maximum stretch. Having a margin of stretch will allow the child to wear the bandage longer and also ensure that the bandage is not too tight.
Dressing tailoring
Sew up the tube. Now you should sew a tube from the cut piece. The tube will form the base of the dressing. It will pass around the circumference of the head, it is to it that jewelry will be attached. Make the tube as straight as possible, although due to the extensibility of the fabric, most of the imperfections will not be noticeable.
- Fold the fabric rectangle in half lengthwise. If you are sewing from stretch lace, then this is not required. For other fabrics, fold the cut-out rectangle of fabric lengthwise in half right side up.
- Pin the material with straight pins so that the fabric cuts lie flat. The pins must be inserted perpendicular to the fabric cuts. This will reduce the chance that the machine needle will hit the pin if you forget it in the fabric. Also, this arrangement of pins makes it possible to sew directly on the pins.
- Stitch along the long pieces of fabric, 1 cm from the edge. Use a needle, thread and stitch that matches the type of fabric you are using. Knitted fabrics require a special knitting needle and a stretchable zigzag stitch. The same can be done manually, only it will take more time.
- Unscrew the tube. You can do this with your bare hands, but it's easier to use a simple tool. The most common method is to use a small safety pin. Pin it on one end of the tube from the inside. Start slowly threading the pin through the tube. This will take some time, but the procedure itself is simple. When the tube is turned inside out, you will need to iron it to make it flat. You can skip ironing if you're going for a looser, draped look.
-
Insert rubber band. The elastic will allow the bandage to stay on the head without the need to attach fasteners or ties. This will also allow the bandage to grow with the child. Also make sure you have enough elastic, as a bandage that is too tight is not suitable for a child.
- Pass the rubber band through the tube. The easiest way is to attach a safety pin to one end of the elastic and thread the elastic into the tube. Make sure that when pulling the elastic through the tube, it does not twist inside.
- Sew the two ends of the elastic by hand or on a sewing machine. It is good to use a zigzag stitch. Again, make sure the elastic is not twisted and lies flat.
- Sew the ends of the tube. Although you can use a sewing machine for this step, it is best to do it by hand. Tuck in the ends of the tube. Carefully stitch the ends of the tube together with small hidden stitches. If you don't want to sew by hand, hand-sew the edges by overlapping them a little. In this case, the stitching will be visible, unlike manual sewing. When the edges are connected, the bandage will be ready!
bandage decoration
-
Make a bow. Once the headband is done, you will need to add embellishments to it to complete the look. A bow is a classic decoration for a little girl that is easy to make. It's a good place to start when you first make a headband for your child.
- For the bow, you will need a ribbon. Try to get fabric tape, as plastic is not recommended in this case. Pick a ribbon that is the same color as the headband you just made and you generally like it.
- There are different types of bows. You can make a simple bow, similar to the one tied with shoelaces, or you can tie a more complex bow, such as those made on gifts. In the case of a simple bow - just tie it. Use an extra few inches of tape to wind it around the center and hide the knot. Sew or glue a bow to the headband.
- For an intricate bow, take a whole spool of ribbon. Take one end of the tape and make a loop out of it, about 5 cm long, then another loop from the opposite side. Continue making loops until the bow is thick enough. Fasten the middle of the bow with stitches and then hide them under an extra piece of ribbon, just like in a simple bow. Glue or sew a bow to the headband.
-
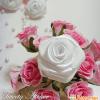
Make a flower. You can decorate the headband with a flower. It looks great on little girls, giving them a fairy look. You can make one flower or many at once. You can use ready-made realistic artificial flowers made of pressed fabric by simply gluing them to the bandage, or you can make flowers yourself.
- Take strips of fabric 30 cm long and 2.5 cm wide. Try to choose a color of fabric that contrasts with the bandage, but still goes well with it. Any type of fabric will work, even plain cotton.
- Stick this cloth on the pipe cleaner, make it a little uneven. This will give the fabric a slightly draped look.
- Twist the brush into a flower socket. If there is only one flower, it can be directly glued to the bandage. Otherwise, first glue the flower or flowers (according to the intended design) onto a piece of felt. Cut the felt so that it is not visible when looking at the flowers from above, and then glue it to the bandage.
- You can make applications yourself from felt. Simply draw a shape and cut it out from one or more pieces of felt. You can also do wool felting (felting) to create a 3D object and glue or sew it to the headband. It all depends on your skills and desires.
- You can also use jewelry items or scrapbooking embellishments to embellish the headband. Sew or glue them if necessary.
Warnings
- Children love to put everything in their mouths. Make sure that the small items attached to the dressing are securely fastened.
- If the bandage is too tight, do not put it on the child's head.
- Make sure the bandage does not slip down and get caught around the child's neck.
- It is necessary to rest the child's head from wearing a bandage, rubber bands and other hair accessories after an uninterrupted hour of wear.
Measure the circumference of your head. To make a bandage, you need to know the approximate size. To do this, you can take measurements or use the size tables according to the age or weight of the child. When taking measurements in person, you need to measure the circumference of your head approximately where the bandage should be worn. Usually the measurement is made directly above the ears.
Headbands are a fashion accessory these days. But vigilant mothers do not miss the opportunity to dress up their baby not only for beauty, but also in order to protect the ears from the wind.
Interested in how to sew a headband for a girl with your own hands? This tutorial, prepared by our reader, details an easy way to make a children's accessory from an old T-shirt - a great opportunity to clear out the closet. If there are no unnecessary clothes, feel free to use knitwear. The thicker the fabric, the warmer the product will be. For the summer it is better to choose thin materials.
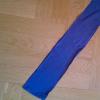
First you need to measure the circumference of the child's head and cut out two identical rectangles from the fabric. The length of each rectangle should be 10 cm longer than the measured circumference of the child's head. If you want a smaller bow, then the length of the rectangle must also be shortened. This example shows how to sew a headband for a girl of nine months with a head circumference of 44 cm. Therefore, the length of the cut fabric is 54 cm and the width is 10 cm.

Alternatively, you can use an old adult T-shirt if it fits.

In this case, it was enough to simply cut a strip of fabric 10 cm wide.

The sides have already turned out to be sewn, the length was just right. It turned out here is such a "collar".

On a typewriter, it is enough to stitch the long sides of the rectangles, folding them with the wrong side to each other. (If the rectangles are not cut out of a T-shirt, but simply from fabric, then you will have to stitch all 4 sides yourself).

Then turn right side out through the small hole you left. This hole can later be sewn up by hand. Now you need to straighten all the corners and iron the finished rectangle.

After that, the ironed rectangle must be folded in half and measure the semicircle of the child's head from the fold. In this case, it is 22 cm (because the full circumference is 44 cm).

In this place, you just need to stitch a double-folded rectangle.

To sew a headband with your own hands, it is not even necessary to match the threads in color, since all the seams are hidden inside. As a result of this seam, a rectangle is obtained like this “fish with a tail” (this is a top view)

This "fish tail" must be laid out on different sides, and it will subsequently be a bow. It remains only to make a jumper for him. You can choose any decorative with rhinestones to your taste. Or you can simply cut a small rectangle out of the same fabric, fold it in half with the wrong side to each other.

Just like the main large rectangle, stitch and turn right side out. Gather the “tail of the fish” with this jumper at the seam, and fix it in this position.
Hats for girls are very important. There are not many of them, like handbags! Such a fabric bandage will come in handy if you are going to have a picnic in nature, do house cleaning or cook dinner. Sew more of them and please your close friends with a gift.
Sew them from multi-colored cotton fabrics. The fabric may be patchy. Look, do you like them? 
The little ladies will love the headbands, rest assured. 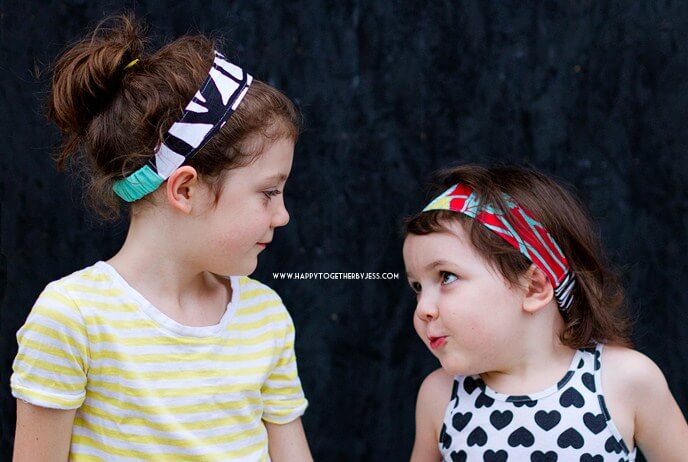
Are you ready to make your first bandage with your own hands?!
What you will need:
- Sample for an adult bandage;
- Sample for children's headband;
- Remains of tissues;
- small rubber band
Notes:
- Measure your head. Increase or decrease the length of the template if necessary;
- Pin the seam at the end of each stitch.
Sewing instructions:
1. Print out the template and cut it out. You will get a pattern. 
2. Fold the fabric in half and cut out two front pieces. 
3. Cut out two parts for the back of the bandage with an elastic band. 
4. You will have these blanks. Make sure that the length of the part with the elastic band is about 14 cm; 
5. Fold the parts in pairs, right side inside. We sew on the sides. 
6. Turn the parts right side out. Use a pin and string. 
7. Straighten the seams and iron; 
8. Lay finishing seams; 
9. Take an elastic band, thread it into the part; 
10. Secure the elastic with a stitch; 
11. Trim the cuts; 
12. Bend the edges of the cut inward. 
13. Align the cuts of the two parts. 
14. Secure them with machine stitching. 
This bandage is very easy to sew, it takes very little time to make it. Great idea, right? Its author. 
Sports men's headbands with logos first appeared on the catwalks a few years ago. The fashionable head accessory quickly lost its gender characteristics, organically settling in the women's wardrobe. Solo headband is a hot trend and a must-have for desperate fashionistas of the spring-summer 2018 season.
In Paris, designers of world brands Balenciaga, Prada, Chanel, Moncler Grenoble, Gucci and others presented it in their collections. Unlike sportswear that conveniently replaced autumn and winter outfits, a straw headband is the main element for a complete look.
The original accessory universally fits into any style:
- can dilute the image of a business woman in a formal suit with a bright accent of the bandage;
- adds creativity to the classics;
- headband looks good in combination with evening dress;
- brings a touch of variety to everyday street-style;
- the bandage fits into the vintage or ethno style;
- hides the flaws of the hairstyle, especially if there is no time for styling, but there is a goal - to look elegant.
Unusually military excellent
colorful black pigeon
from china fashionistas cartoons
The main thing is that a fashion accessory can be worn by children, young people and adults. The bandage beautifully decorates the heads of newborns or young girls. A teenager, a young lady or a mature woman can use this element to create her own original image.
A straw bandage is a strip of different types of fabric, inside of which a wire is stretched. This design resembles a bezel. It allows you not to build a bow on your head, but simply twist the ends, easily fixing the accessory on your hair.
Baby headbands for children under one year old can be sewn soft or knitted like a turban (twisting the ends in front). This is a precaution so as not to apply even minimal pressure. Ready bandages are widely distributed in the market. A piece copy of the solokha can be sewn independently.
Experienced needlewomen share bandage patterns. They offer different ways of making and modeling an accessory.
How to make a beautiful headband
The idea to support the hair with a scarf folded into a straight linen belongs to the heroine of the film Evenings on a Farm near Dikanka. Hence the name of the bandage Solokha. Following fashion trends, designers have brought the idea to perfection. The collections include bandages that can be sewn on the head.
To perform the solo, different cuts and types of fabric are used:
- openwork, knitted, cotton, silk, velvet, satin, chiffon, denim;
- thin summer or thick warm, knitted or crocheted;
- seamless or assembled from parts;
- straight stripes or with ears to replace earmuffs for cold weather;
- narrow or wide canvases.
Fashion print headbands:
- one-color or two-color pattern for a classic or office style;
- with a floral, geometric, striped or other bright pattern that is selected for an evening or daytime look.


superbly amazing
bicolor what you need sailor
women are amazing with their own hands
Creative decoration of headbands that can be sewn:
- rhinestones, metal or wooden baubles, shells, sparkling crystals, sequins;
- sheathe with beads, large pebbles, beads, buttons;
- make elements of foamiran (plastic material), lace braid, felt, polymer clay;
- complement with fur, feathers, brooch, kanzashi (Japanese-style bows), etc.
What tools and improvised materials need to be prepared to sew a headband for the head:
- cutting scissors;
- threads, a needle with a large eye;
- wire up to 2 mm in diameter, 170 cm long;
- piece of fabric up to 12-14 cm wide, horizontally up to 90 cm;
- cardboard or whatman paper to make patterns;
- rubber;
- chalk and pencil;
- ruler.
Many homebody needleworkers know different techniques of knitting from yarn, weaving from fabric strips or ropes. These are Japanese kumihimo or mosaic techniques. Different versions of the models are shown in the photo.
How to sew a straw (bandage) on a child's head


Stylish colors
do-it-yourself two-tone amazing
superb pigeon cartoons
Even a beginner can easily cope with the manufacture of the product. The process itself does not require professional skills in cutting and sewing. The main thing is to correctly and accurately perform the actions, following the step-by-step instructions.
Master class to sew a wide headband for a girl in the style of a straw on her head:
- You need to start with a pattern, making measurements of the fabric base with a ruler.
- Cut out two identical strips for the bandage - width 14 cm, length 38 cm.
- Make a blank for the tips of cardboard - rounded or sharp.
- Lay the strips of fabric right sides together.
- Adjust the pattern to the corners of the canvases, circle with chalk.
- Sew the bandage elements around the perimeter without touching the bottom.
- Do the same for the second part.
- The last element is the middle strip for elastic, the width is unchanged, the length is 20 cm.
- Fold the fabric with the face, sew along the edge.
- Carefully unscrew all three parts, iron with an iron.
- Take a piece of a wide elastic band, about 10-12 cm.
- Insert into the middle short piece.
- On a long strip, fold the edge by 0.5-1 cm.
- With an overlap, put on one end of the part with an elastic band, bast.
- Sew the bandage over the top carefully.
- Similarly, repeat the steps on the other side.
- Beautifully tie the ends.
Patterns (bandages) solokha on the head
Patterns are straight, curly, narrow or wide. To sew a headband with wire, you need a pattern for cutting two parts, with an elastic band - three. In both cases, prepare a separate pattern for the tips. 
Polka dot winter spring
wearing model glasses
stylish colors on the head
Fabric headbands
When choosing the type of bandage, it is necessary to take into account the color, structure, length of curls, hairstyle model. It is important that the rim on the head is combined with the image.
- loose hair - the canvas is stretched under the hair, it is better to tie the ends in front;
- gathered in a bun - a bandage is worn over the hairstyle;
- for long curls, use a wide straw, for medium or short curls - narrow;
- bangs - you can leave it free or put it under a bandage, you need to take into account the height of the forehead;
- curls - broadband options are suitable;
- you can’t wear an accessory to match your hair, it is matched to the color of clothes, shoes, belts, jewelry, etc.
Headband design tips:
- the longer the straw, the greater the field for the manifestation of fantasy. From the tips, you can make a knot dressing, decorate with a bow, twist around the rim like a turban, leave it hanging down on the side, pin it with an original clip;
- for everyday style - active girls are suitable for headbands with wire, which are well attached to the head;
- with bows or flowers - for sundresses, retro or for special occasions;
- with lace or colorful decor - for a vintage look or evening dresses, especially with straps;
- knitted - for any insulated clothing;
- bright animalistic, floral, abstract or geometric print - will organically fit into casual, boho, street or ethnic style;
- elastic or knitwear - look good under summer outfits, sportswear, jeans, shorts, skirts, flat shoes;
- two- or plain - for office style or classic. One shade is matched to the main color of the outfit, the second - with an emphasis on jewelry, bag, eyes, etc. A good example is large or small peas.


Denim headband
An integral attribute of everyday street style is denim clothing. It is worn even at business meetings, solemn or public events. A denim headband is paired with jackets, shirts, dresses, overalls, shorts or shoes in a similar fabric.
Any color from white, light blue to classic blue. Styling chic - decor with embroidery, fringe, massive metal elements or stones. Looks trendy with ripped jeans.
To sew a bandage, you need to choose a certain type of denim. Suitable chambris, stretch, summer. From lightweight material, you can sew a straw with an elastic band or wire for better fixation on the head. The choice depends on the hair and application.
In our country, the straw dressing got its name thanks to the heroine of Gogol's beloved play "The Night Before Christmas".
But, in fact, the accessory so fashionable this season appeared in America back in the days of slavery, it was then that African women tied a scarf on their heads with the ends up. Further, this style migrated to more modern times and became known as Pin-up. Women living in American villages or on ranches, the so-called "cowgirls", also fell in love with the bandage. Well, the bandage with a bow, of course, reached the peak of its popularity in the sixties of the last century, at the time of the appearance of the so-called "Dandies".

Nowadays, such a bandage will look especially original in an ensemble of mother and daughter style. There are several ways to sew a bandage with a bow with your own hands. Let's consider one of them. The bandage will consist of two parts: the bandage itself with an elastic band and decoration in the form of a coquettishly tied bow.
What will be needed for manufacturing?
First, some free time and your desire. Secondly, fixtures and materials such as:
- sewing machine,
- scissors,
- sewing centimeter for measuring the circumference of the head,
- pencil or crayon
- threads by color
- about 50 cm of a loose elastic band with a width of 3 cm or more,
- a piece of cotton or chiffon fabric.
Surely all these materials can be found with an experienced housewife who appreciates work with her own hands. In extreme cases, everything can be purchased at the nearest store selling sewing accessories.
How to sew a bandage with your own hands
Work should begin with measuring the head of the child, for whom the bandage is actually sewn. In our case, the volume of the head is 43 centimeters. We advise you to use a balloon inflated to the desired volume or a soft toy for trying on. On the fabric from the wrong side, we draw the part in such a way that the result is an oblong rectangle measuring 55x10 cm. From it we will sew the so-called tube into which the elastic will be inserted. To do this, fold the strip along the right side inward, stitch along the long side, turn it right side out, insert the elastic. Sew the ends of the elastic with an overlay seam. We bend the ends of the fabric tube to the wrong side and sew together with hidden stitches.
We turn to sewing a bow. In the same way, we draw a rectangle for the future bow, only the size will be 30x13cm. At your own discretion, you can narrow and round the ends of the bow, or you can leave it as it is.
Two examples of different design of the ends of the bow:

If the hostess has little experience in the art of sewing, then you can first make a bow pattern on a sheet of paper, and then transfer the shape to the material. A beautiful volume of a bow is usually given with the help of a metal wire inserted into the product. For safety reasons, since the bandage is sewn for a child, the shape can be transferred using a thin synthetic winterizer, or a non-woven backing. Be sure to iron all the details from the wrong side. Fold the bow detail in half lengthwise with the right side inward, sew the details along the edge, leaving an opening for eversion, turn inside out.
The result should be a "tube" and a bow. We insert the elastic into the “tube” and sew it on the sewing machine, then we sew the ends of the product itself.
We tie a bow, straighten the knot and sew with a hand needle to the bandage itself. The bandage is ready! Thus, having spent quite a bit of time, a mother can please not only herself, but also her little daughter with a fashion accessory!