Tutu, chopinka, ballet, tulle skirt - whatever they call it. In such a skirt you will definitely not go unnoticed, and to make it you don’t need much: suitable fabric, scissors, a sewing machine and a little patience. Actually no - it will take much more patience and perseverance than a drop. But believe me, even a beginner can do it, once you start!)
Fabric selection
This skirt required 10 meters of tulle with a fabric width of three meters.

I ordered it from this store http://fatin.ru/ The seller has a group on VKontakte, as well as a store at the Masters Fair - very convenient.
A soft, thin mesh is suitable for such a skirt. Among the options offered in this store are “silk tulle” and “euro tulle”. I've dealt with both. I like Eurofatin better, but these are rather subjective impressions. It is more pleasant to the touch, slips less and is more convenient to use.
In order not to make a mistake with the footage, you can make a sketch of the layout on the fabric on a scale of 1:10. That is, just on paper in a box.
You will also need lining fabric of a suitable shade. Here's what the eye catches. The key parameter is that it is pleasant to the body, so give preference to natural materials.
Fabric for the belt (width of the elastic band + allowances), the elastic band itself (mine is 2.5 cm wide) and threads - it seems that everything is in terms of materials.
The circle of the sun, the sky around...
This is a circle skirt. That is, a circle with a hole for the waist. I won’t explain in detail about the construction of the pattern; there is a lot of information on the Internet. I will only give my calculations. My waist is 68 centimeters, my hips are 90, and the length of my skirt is 70 cm. It turned out to be two circles: the smaller one with a radius of 15 cm, the larger one - 85 (how nice that the elastic belt allows you to round the numbers))

Later, using the same pattern, I sewed a skirt for a girl with slightly different parameters, I just added 1 centimeter in the radius for the waist and the circumference, that is, the holes for the waist, was already 100 centimeters. Don’t be alarmed, this is not a 100 cm waist, but we also need the hips to fit))
In general, we remember school and the basics of geometry: 2πr, where π=3.1415926535... and so on. (3.14 - if anything, it’s quite enough). And if you don’t want to go into details, use my calculations. They are suitable if your hips are less than 95 centimeters.
It’s more convenient to build the sun directly on fabric, but this trick won’t work with tulle - drawing on it is hellish hell. So good old paper.
The pattern in the “paper” version is half a circle. I wanted the top layer without seams with gathering for pomp, so there was another circle with a radius of 105 cm, an inner radius of 35 cm (a quarter of a circle is enough here). Wide wallpaper left after renovation is quite a suitable material.
Running in circles
Cutting is the longest and most labor-consuming process. 10 meters of fabric - remember? To cut out this happiness, I asked my friends to go to a fitness club. Later experience showed that it was possible not to show off and stay at home, after moving the furniture. But believe me, room to maneuver is a big plus!
Lay out the tulle. First, let's work on the top layer of the skirt. We measure from the corner 105 cm, fold the fabric four times...

We lay out the pattern, press it with whatever we need...

And carefully cut it out. We are glad that everything worked out. We put it aside and proceed to the most exciting process - revealing the remaining ten layers.
We fold the fabric lengthwise and methodically cut our circles.

A little secret - the pattern can be glued to the floor or table (in general, the plane on which you work) with tape. By placing almost transparent tulle on top, you will control all the folds in the fabric.
For some reason there was no tape in the aerobics room, so I had to suffer.

Since the fabric is folded in half, some of the layers turn out to be one-piece, and some - in half. Seam allowances are not necessary. Firstly, the fabric does not fray and can be sewn very close to the edge. Secondly, slippery elastic tulle still won’t be cut out perfectly and half a centimeter +/- in the waist area no longer plays a role; if anything, you can gather it somewhere during basting. But these are the recommendations of a lazy amateur who is always looking for how to avoid unnecessary movements. If you don't give a damn like me and are used to doing everything right - do it!
Happy ending
We sew the halves together, the whole “suns” are ready for further work. I wanted more fluffiness, so I sewed the second layer from four halves of the sun, that is, at the waist the volume turned out to be twice as large as necessary, all the excess went into the folds. The third is made of three halves. The rest are as usual.
Now we need to do the assembly. It's simple. Using the machine, we lay two parallel lines with the maximum stitch width. Then we pull out the bottom thread, trying to distribute the folds evenly.
In the end, I got: three layers with assembly and five “regular” suns. We lay them out on the floor and assemble one or two layers in succession, sweeping away and then removing excess threads. You can use pins, but they are not very friendly with tulle. We send suns with seams as one-piece ones. You can move the seams relative to each other, although in a cloud of tulle little things will not be noticeable.
I won’t go into detail about the lining. It can be cut into a semi-sun or trapezoid - whichever is most convenient for you. Don't forget that it should be a few centimeters shorter than the skirt itself.
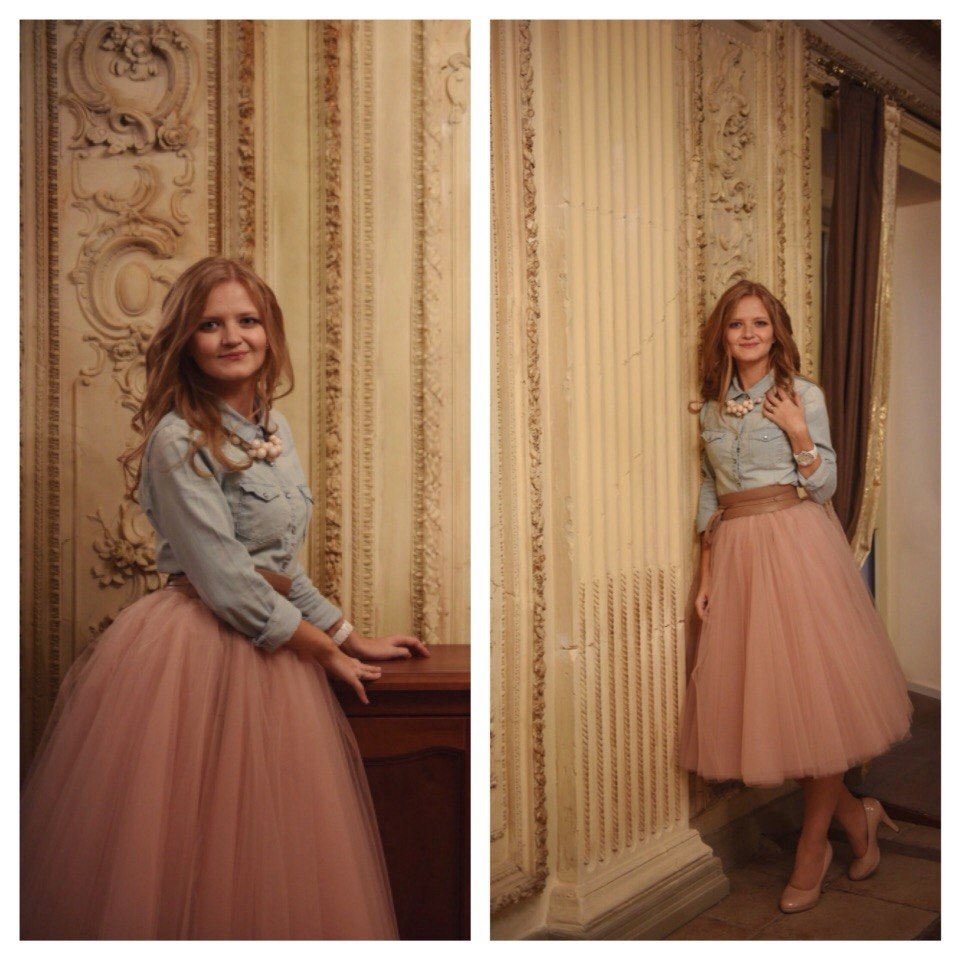
The belt is in the form of a drawstring, where an elastic band will then be inserted. I’ll say right away that this option is not ideal, since in the future it will have to be covered with something. On top I have an overhead belt-sash made of Mango.
There is perfection in the world, in this case it is an ordinary belt about five centimeters wide. 
Here is a very detailed and accessible master class on how to create one. But for this belt, the skirt itself must have a zipper. Sewing a dozen layers of tulle to it is problematic. But if you have fewer layers, you can try it. I got it with four plus a lining.
That's probably all. Go for it, you will definitely succeed!


And this is the beautiful and creative Dasha in my skirt.

I sewed it the same way, only there were about 10-12 layers. And we decided to dilute the mint silk tulle, which was a little bright for our taste, with milk, alternating layers.


Tutu skirts look charming on little girls and advantageously emphasize the image of adult girls.
You don't have to go shopping to get this trendy item into your wardrobe.
Let us prove that a DIY tutu skirt is simple and affordable.
DIY children's tulle tutu skirt

The best material for a tutu skirt is tulle. This fabric consists of a nylon mesh, which makes it look airy and gentle.
Let's get started:
- We take measurements.
Before sewing a skirt, you need to measure the child’s waist and the expected length of the product. Instead of measurements, you can use an existing skirt that fits the girl.
- We purchase materials.
You will need approximately 1 m of tulle and 1.5 m of satin ribbon.
In addition to the main tulle, we also suggest using fabric of a similar color with glitter to make the skirt even more beautiful and magical.
Diversify the skirt with tulle of a different color. Additional fabric will require about 0.5 m.
- We cut out the tulle.
Based on the measurements taken, we cut off four pieces of fabric.
If you are using extra tulle, cut only one rectangle from it.
- We sew the edges.
Step back a couple of centimeters from the edge of the fabric, set your sewing machine to the maximum stitch length and sew along the top edge of each piece.
- Create folds.
Grasp the threads at the beginning and end of the seam and begin to gently pull them, forming folds.
“Gather” the skirt until the length of the folded top seam corresponds to the measured waist size.
We do the same manipulations with all pieces of fabric.
- We secure the folds.
We set the average stitch length on the machine and sew the fabric along the already made seam.
- Assembling the skirt.
Place all the pieces of fabric next to each other. Place the shiny tulle on top, and arrange the colored layer as you wish.
After the layers have been gathered and aligned, you need to sew the skirt along the top line.
- Making a belt.
Bend the satin ribbon in half and iron it.
We cover the seams on the skirt with tape and pin them, and then stitch along the bottom.
The free parts of the ribbon on the sides will become the belt ties.
Tutu skirt for adults: how to sew
If you dream of adding a tutu skirt to your wardrobe, you can easily sew it yourself.
Here's how to make a stylish skirt with your own hands:
- We take measurements.
You need to measure your waist and decide on the length of the skirt: short, knee-length or long.
- We buy fabric.
You will need:
- Tulle (at 87 cm, about 6 m of fabric is required).
- Material for the top layer of the tutu skirt (silk, organza or the same tulle).
- About 15 cm of bias tape.
- Elastic up to 12 mm wide (length equal to waist circumference plus 2 cm for seam).
- Threads, pins, cutting knife.
- We cut out the fabric.
Cut out 10 pieces of fabric equal to the desired length and width of the waist.
For the first step of the skirt you will need 2 pieces of tulle, for the second - 3, and for the third - 5.
- Sew the layers of the skirt.
We fold the two fabrics of the first stage and sew them on the sides. We overcast the allowances.
We do the same with the remaining parts of the tutu skirt (for the second we sew three pieces of fabric, for the third - five pieces of fabric).
We sew all allowances together and iron them.
- Assembling the skirt.
First, we sew the bottom layer of the product along the outer edge with bias tape.
We measure the width of the lower cut of the second step and gather the upper cut to this length using a long machine or hand stitch. We stretch the edges of the threads, collecting folds.
We do the same with the rest of the skirt, tie the threads and sew the final seam.
- We sew the top edge of the skirt.
We do this using an overlocker or using a zigzag stitch.
- Sew on the elastic.
So that it does not catch the eye, we make a drawstring or stitch it on top with a satin ribbon.
- Cut out the top part of the skirt.
We draw patterns for a circle or half-sun skirt.
To create a pattern, we use the data on the radius and height of the product. We calculate the radius as follows: divide half the waist circumference by 3.14. In our case (elasticated belt), we take into account the circumference of the hips.
Fold the fabric in half, place the pattern on top, trace and cut out two pieces of fabric.
Sew the side seams of the upper skirt and trim the bottom edge.
- Attach the top skirt to the rest of the tutu.
Before sewing the tutu skirt together, mark 4 equal segments on the top layer.
We do the same on the elastic or drawstring of the rest of the pack.
We turn the top layer right side down, put it on the pack, and place the intended segments on top of each other.
Sew, turn the top layer right side out and smooth out the frills.
If desired, decorate the finished skirt with a lace belt and any other accessories to your taste.
A tutu skirt looks cute and romantic. It will decorate a girl's wardrobe and will make others marvel at your sewing skills.
Have you ever sewed clothes for yourself?
Today, young parents want to dress their children fashionably, comfortably and beautifully. And many people dream of spending little time and money on outfits. That's why you can do it yourself. A master class on how to make it is described in this article. This wardrobe detail will perfectly complement a girl’s festive outfit. Its creation will be exciting not only for mom, but also for the little fashionista.
First option
A DIY nursery is a simple and elegant solution for an unexpected holiday or picnic. We don’t need any special skills or tools: a wide elastic band (to gather the product at the waist), tulle, scissors and ribbon. And you can start working.
Selection of materials
- Tulle: hard or soft, depending on what kind of skirt you want (it could be a tutu or just a full skirt). Color is at your discretion and preference. You can combine several shades, then it will turn out even more interesting. Lay the fabric out on the table and fold it in half along the long side. Then use pins/soap/chalk/pencil to make marks in increments of twenty centimeters. You should get forty-nine marks, that is, fifty stripes. Next, cut out the parts and set them aside. Their length corresponds to double the length of the future skirt.
- Elastic band 2-3 centimeters wide. Its length is the child’s waist circumference plus 5-7 centimeters.
- It is better to take the ribbon a little thinner, but longer, in order to tie a bow.
Stages

We take an elastic band, tie or sew its ends and pull it over the back of a chair or over a ladder to fix it in a stretched position. It is better, of course, to sew it together, since the knot will put pressure on the child’s skin and interfere with the uniform distribution of the tulle. You can involve older family members in this activity, who will hold the elastic band with outstretched arms, as when winding yarn, but they may quickly get bored with this (remember this).
Now you can start tinkering. We take a strip of tulle, find its middle and throw it over the elastic band, tying it in a knot at the bottom. It should not be too tight so as not to squeeze the belt. Otherwise, the skirt will not hold well and will fall off. One by one we tie the tulle pieces around the elastic without overlapping the knots.

When all the stripes are tied, you need to use scissors to trim the ends of our skirt so that it looks neater. And the final decorative touch is threading the ribbon. Insert it between the knots in a checkerboard pattern, and tie the ends with a bow.
That's it, the children's tulle tutu skirt, made by hand, is ready!
Second option
In this case, we may need the skill of working with a sewing machine or at least a thread and a needle. It’s easy to make from tulle with your own hands, you just have to want it. And we will try to help you with this. So, let's begin.
Materials
- Tulle, the width of which is one and a half meters, and the length is equal to the length of the finished product multiplied by two. Again, depending on whether you need a tutu or just a full skirt, the stiffness of the material can be varied.
- An elastic band that corresponds to the girl’s waist circumference with a small margin.
- Needle, thread, sewing machine.
Process

To begin with, you should carefully fold the tulle along its length and stitch or sew it, retreating from the fold by a centimeter. If necessary, you can connect several of these stripes, then the skirt will be fuller. To do this, you need to insert the edge of the next fabric into the fold of the previous one and stitch it. It will be more accurate this way. Fasten the ends of the threads well. After the preparatory stage, we begin to work on the elastic band. We put a pin on one end and hold the other in our teeth or between our knees. Then we stretch the free end (with a pin) through the fold of fabric formed after the stitching, putting the tulle on the “belt”. Be prepared for the fact that you will have to pull the elastic tightly, as there will be a lot of tulle. It is better to sew the edges of the elastic overlapping. That's it, the children's tulle tutu skirt, made by hand, is ready! You can sew along the edge of the hem, then the skirt will not cling to the tights and will become more elegant.
Third option
Another way is to make a tutu skirt with your own hands. The master class is attached in this article. To sew this product, you may need the ability to work with a sewing machine with knitted fabric, chiffon and tulle. A fluffy children's skirt made of tulle, sewn with your own hands, will look good as a petticoat.
Necessary materials
- A small piece of knitted fabric. We will need it for the belt, so take thick material that does not stretch.
- Thin and soft chiffon as a basis for ruffles. With a width of one and a half meters, you will need about two and a half to three meters of fabric (for five layers).
- Medium hardness tulle 1.5 m wide.
Progress

Fold the knitwear in half lengthwise and cut a strip equal to the child’s waist circumference with a seam allowance. Set this part aside for now, we will need it later. Now let's move on to chiffon. Iron it. Fold in half lengthwise and place on the table. Then take a ruler or measuring tape and mark the length of your skirt along the fold five times. Then cut the fabric into strips. You should end up with five cuts of fifty centimeters each, or less if you need a different length. From tulle we cut pieces twenty centimeters wide and one and a half meters long. There should be ten of them.
Now let's move on to the assembly. A do-it-yourself tulle tutu skirt for a girl will be created in a couple of hours. After all the preparations have been made, you need to take the tulle parts, fold them lengthwise and stitch them in the middle, gathering them a little on a thin line. When one strip comes to an end, we attach a second one to it. As a result, we should have five stripes of three meters each. After this, carefully pull out the bottom thread, but do not break it, so that the tulle gathers into folds. We perform this manipulation with all five parts. This was the most difficult part of the job. The children's room we created with our own hands is almost ready.
Now we take one piece of chiffon and attach tulle to it, stepping back five centimeters from the edge. When all the chiffon parts are fused with the tulle parts, you get five petticoats. All that remains is to connect them. To do this, we adjust the parts one on top of the other, retreating half a centimeter from each seam. At the end we sew a belt to cover the working part of our skirt. We do this according to the principle of basting the edging: we apply the front side of the belt to the front side of the skirt, and baste it. Then we throw the belt over the edge and carefully pin the fabric on the other side, bending the edge inward and making sure that it does not curve. Having made sure that it turned out evenly, we iron it through gauze, and then sew and remove the excess threads. That's it, the baby tulle skirt, designed by yourself, is ready!

As you can see, this is an easy and affordable way to please your child with a new outfit. made of tulle, created with your own hands, is a manifestation of mother’s love, care and creativity.
Every girl dreams of a fluffy skirt in which she can feel like a princess, fairy or ballerina. Any mother can make her daughter’s fantasy come true by resorting to basic cutting and sewing skills. A ballet tutu is easy to sew with your own hands without using a pattern or any complex techniques. How to do this will be described in this article with a detailed description of all stages of the work, as well as photos and video materials.
Having made such a tutu for a girl, a mother can try to sew something similar for herself, for example, a chopin skirt. There are also many interesting and accessible educational materials on this topic on the Internet. In the meantime, let's study all the intricacies of making a tutu for a girl.
Learn how to make a ballet tutu with your own hands in a master classThe easiest version of a tutu skirt for girls.
You will need:
1) Tulle (the number of colors and length of the material depends on the intended style of the product);
2) Wide elastic band;
3) Centimeter tape;
4) Silk ribbon;
5) Thin elastic band;
6) Scissors;
7) Needles, threads.
Manufacturing process:1) First of all, we measure the child’s waist, to do this we wrap the elastic band around it and tighten it to the desired length, not forgetting about the seam allowances. The girl should feel comfortable in the skirt, but the elastic should not fall off under the weight of the fabric. These points should be taken into account when measuring.
3) Cut the fabric into strips. Their length should be equal to two lengths of the final skirt. The width is about 25 cm. For splendor, it is better to cut about 50 of these strips.
4) Pull the elastic band onto any available object. This could be a chair, a saucepan, a table lamp, etc.
5) Let's move on to the main part of the work. We wrap each strip in turn around a stretched elastic band (the ends should be the same length) and secure. You can fix it using a regular knot, but this method is not the most reliable, because During wear, the knots may loosen and the skirt will lose its appearance. It is best to secure the tulle strips with a thin elastic band. There is another method in which the strip is threaded through an air loop created with a crochet hook and tightened. You can use any of the options proposed, but do not tighten the fastener too tightly.
6) Then we evenly distribute the tied strips of fabric over the base and straighten them, giving the product volume.
7) We thread a satin ribbon through the formed loops and form a bow. The skirt is ready!

The product can be decorated with decorative flowers or sparkles, paints and stencils can be used for decoration. If desired, you can make a train; to do this, cut strips of tulle of different lengths, which are then stacked on top of each other in layers (the shortest pieces of fabric should be on top). Then baste the layers to the ribbon, and it, in turn, to the formed knots on the skirt. The result will be a product similar to the one shown in the photo below.

When doing this work you will have to tinker longer than in the previous method. However, even a novice craftswoman will be able to make a ballet tutu. A master class with a step-by-step description of the process will help with this. We will use few layers of fabric, only 4, for a start this amount will be optimal. There is no need to cut out the circles for the skirt; they are formed from strips of fabric, which makes the task much easier.
You will need:
1) Tulle of the selected color (fabric length is at least 6 meters);
2) Linen elastic;
3) Satin ribbon;
4) Scissors;
5) Threads and needles.
Manufacturing stages:
1) Decide on the length of the skirt and choose the width of the strips of fabric. It is better if the diameter of each next layer of the product is 2.5 cm smaller than the previous one. Following this rule, we take the following dimensions for 4 layers: 37.5 cm, 35 cm, 32.5 cm and 30 cm.
2) Lay out the roll of tulle and cut off 4 strips of fabric, the width of which will be 37.5 cm. Then we sew them in one line.
3) Using a basting stitch, we pass along one side of the sewn strip of fabric, secure the thread with a knot (it is better to use thick sewing thread).
4) Next, pull the knot, creating folds in the fabric. The length of the gathered edge should be equal to the waist circumference. When this condition is achieved, the end of the thread should be secured with a knot. Similarly, we form the remaining layers, the sizes of which were chosen at the very beginning of the work.

6) Then we attach the resulting parts to the belt-ribbon. Below there should be a layer with a smaller diameter, on top - with a larger one. This arrangement will give the product rigidity and improve its appearance, making it as close as possible to a classic tutu.
7) Lay out the skirt on a horizontal surface and press the folds together. Then we sew the layers of the pack with large stitches, securing the shape.
It turns out to be such a fluffy and tough tutu skirt!

Video materials on the topic of the article
Several training videos that clearly show how to sew a fluffy ballet skirt.
I think all the mothers of the world will agree, there is nothing more charming in the world than a baby in a tutu skirt. By the way, the tutu skirt, or tutu as it is also called, is a real find. After all, with its help you can make almost any costume for a girl for the New Year, birthday or matinee in kindergarten, etc. In general, it doesn’t matter on the eve of what holiday you decide to make a tutu skirt with your own hands, the main thing is that with the help of our selection of master classes you will surely cope with this task with ease.
I won’t focus too much on the choice of materials. You will need tulle, fortunately, nowadays the choice is simply huge. You can buy tulle in bobbins or in large rolls, of any color and different hardness. Plus the base on which the tulle will be “attached”. This can be a ribbon, elastic band or knitted base - see the master classes below for more details.
How much tulle do you need for a tutu skirt?
Unfortunately, not everyone has the opportunity to buy tulle in bobbins. But ordinary tulle can also be carefully cut into standard 15 cm strips. Watch the video on how to quickly and easily cut ordinary tulle for a TUTU tutu skirt - both with smooth and sharp edges.
How to make a tutu skirt from tulle master class
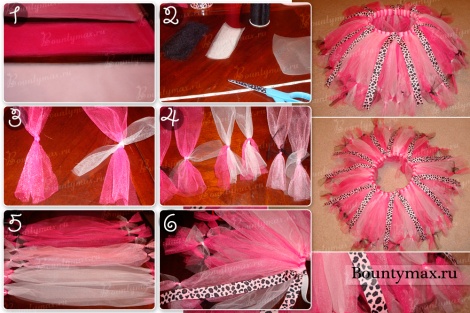
So, the first version of the skirt with the base as a ribbon. In this case, you will get an apron skirt. We cut the tulle into strips, their length should correspond to the desired length of the skirt multiplied by 2. Next, fold the strip in half and tie the ribbon as shown in the photo in points No. 7-9.

We continue to tie the ribbon with tulle until the skirt is completely formed. At the end, for beauty, you can cover the nodules with a cloth.

Or you can leave it as is.

For greater reliability of such a skirt, make “tacks” at the beginning and at the end. To do this, make knots on the base of the ribbon itself (at the beginning of photo No. 3 and at the end of No. 8), additionally tie the first and last tulle ribbon in half.

It turns out to be a beautiful tulle skirt.

The photo below shows a knot that can be used to secure the previous option. Those. you first thread the ends of the ribbon into the loop as shown in the instructions, then tighten the knot as shown in the photo below (you will only need to thread the ends of the ribbon again). Or you can use this knotting method as a DIY way to make a skirt. You tie loops on strips of tulle, which you simply put on the ribbon.

Although the previous options have a drawback: there is a possibility that the tape will come undone at the most inopportune moment. Therefore, it is better to use a wide elastic band. Its length should be equal to your daughter’s waist circumference minus 2-3 cm and plus a seam allowance. We sew the elastic band into a single ring, put it on a hanger, jar or box (this is necessary to make it more convenient to tie). We tie it in the same simple way, the main thing is to pay attention to the fact that you do not need to tighten the tulle too much (the elastic band should not be pinched).

In addition to a wide elastic band, a narrow one will also work. In addition, to make a full tutu skirt, you can tie two strips of tulle at a time.
 Tulle can also be tied with a simple knot (twice). The main thing to remember is that the elastic band should not be overtightened. In the video, the process of tying such knots begins at 3:47.

The finished tutu skirt can be decorated with a bow.

Ribbon bows simply tied to strips of tulle look cute.

How to make a beautiful tutu skirt with your own hands
In addition to additional decor in the form of bows and flowers from ribbons, you can beautifully hem the bottom of a tutu skirt. The result is stunning, and not much work. True, in this case you will have to resort to the help of a sewing machine. Choose a ribbon and thread to match the tulle, and make the skirt in a way that is convenient for you. From the ribbon, cut strips corresponding to the size of the tulle and sew them on.
Important: you need to burn the edges of the cut pieces of ribbon so that they do not fray.

For more details, watch the video instructions:
Wrap the belt nicely with the same ribbon.

The result is a simply gorgeous tutu skirt.

Video instructions in Russian: tutu skirt with satin ribbons (working with ribbons from 4:30).
Plus, if you make a tutu skirt according to this master class: the bottom will turn out with full rings, and not with hemispheres.

The original hem of the skirt can be done faster. Simply cut small strips of tulle in contrasting colors and tie them around the edges of the ribbon on both sides, as shown in the photo below.
Speaking of edges, you can make them ragged or pointed - cut the strips at an angle. And pay attention, this master class demonstrates a new method of fastening using an elastic thread.

Plus, due to the different lengths of the stripes and different colors, after separating them we get a beautiful multi-tiered skirt.

For greater clarity on how to fix tulle strips using an elastic thread, watch the video (from 4 minutes).
In addition, to create a multi-tiered mesh skirt, you can tie an elastic band first in one color, then in another.

Or combine the stripes, as shown in the photo below.

Another way to make an interesting skirt is to add stripes of fabric to the tulle.

Actually, you can make a tutu skirt purely from strips of fabric.

Knitted tutu skirt
Finally, a few words about knitted bases for a tutu skirt. In particular, in some online store (for example, on Aliexpress) you can order a factory-made, crocheted elastic band “pipe” (it is also called a top trumpet - you can use it to make dresses from tulle). Or buy a smaller copy of it: an “elastic bandage”, this is the same as a tube top, just smaller in size. Actually, the photo below shows a narrow elastic band (bandage). Working with it is quite simple; you tie it using any of the methods presented above.

Moreover, you can only knit a couple of bottom rows so that a small belt remains on top (as shown above). Or you can fill all the rows - this will give you a very full tutu skirt.

But keep in mind: if you tie all this elastic, the skirt will turn out heavier. Therefore, it is better to further strengthen this foundation. To do this, insert 2 narrow elastic bands in a checkerboard pattern from the wrong side into the “loops” (as shown in the photo instructions below). In addition, this technique is clearly demonstrated in the video above with satin ribbons.
Length of elastic band = waist size divided by 1.5, better try it on a child; you may need a little longer.

In addition to rubber bands, this design can be supplemented with tape. Cut a long piece of ribbon (enough to go around your waist and for the ties). On one side, pin a pin to the ribbon and insert it into the loops through one. When you finish threading, straighten the length of the ribbons, trim the frayed edges and carefully burn them with a lighter. The result is a very full tutu skirt with an adjustable waistband.
Start threading the ribbon where you want the bow to appear.

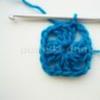
Unfortunately, not everyone has the opportunity to buy such an elastic band for a tutu skirt. But don’t be in a hurry to get upset, you can crochet it yourself using stretch yarn.
For detailed instructions on how to knit an elastic belt/bandage, see the video:
Here is another good video, in Russian. It shows how to crochet elastic in different ways.
In addition, if you do not have the opportunity to purchase either ready-made elastic or stretch yarn, knit a belt from regular threads. In this case, not even a belt, but a strip equal to the waist volume. Sew buttons on it and you will have a wonderful Tutu tutu skirt.


By the way, using the same hook it is easy to decorate it with additional tulle bows.


I hope our selection of master classes on how to make a tutu skirt with your own hands helped you. In addition, I recommend watching another selection of master classes: “” - there are also decent options there.