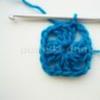
In summer you want something new and unusual. Our regular author Anna the needlewoman presents two more crocheted summer handbags.
Sea bag
In this master class we will crochet a stylish summer bag in a nautical style. This bag is perfect for everyday walks and for the beach. And it is knitted on the basis of a square with ordinary double crochets.
To knit a bag we will need:
- Yarn of two colors;
- Hook.
You can knit a bag from the yarn you like. First we knit the bottom from blue yarn. This is an ordinary square. Let's make the bottom one color.
We make a sliding loop. Then, instead of the first double crochet (DC), we will cast on 3 air loops (VP). Next, we will start each row with 3 loops instead of a stitch.
And repeat 3 more times 3 dc and 2 ch. At the end, we connect the knitting and tighten the sliding loop. We got a square, which we will further expand with the help of increases in 4 places of each row.

In the corners we have 2 VPs. We will make improvements to them. To do this, we knit 1 dc above each dc. Next, under 2 VPs, we always knit 2 Dcs, 2 VPs and 2 Dcs in all rows. This is how increments are formed. We connect the rows. And for convenience, we pass under the VP with connecting posts to start knitting with increases.

We knit the bottom of the bag of the required size.

Then we will knit 3 rows with white yarn and 1 row with blue yarn. But now we need to make both increases and decreases. To do this, we knit the 1st increase as usual in the corner. And then we count the number of lower CCHs. Subtract 5 loops. And divide the remaining amount by 2. Knit the resulting number of dcs.

Now let's turn it down. To do this, we do not tie the next CCH. We skip the next column and again do not complete the dc. Again we skip 1 column from the bottom and do not knit the next one.

We knit these columns with 1 loop.


This is how we gain the height of the bag.

It is best to finish knitting in blue. And now we will knit the first handle from the corner. We cast on from 70 to 100 loops. We attach the chain to the 2nd corner.
We unfold the knitting and skip 2 loops in the handle, knit further with a DC and at the end join the 2nd loop of the base of the bag.
We knit 1 more handle in the same way.

The summer crochet bag in a nautical style is ready!
Knitted handbag, crocheted
A woman always wants to stand out from the crowd. And he uses various accessories for this. In this master class we will knit one of these accessories, namelybright crochet handbag. This bag doesn't take long to knit. But it looks very elegant and festive. You can combine any colors you like in it. You can knit it for a bright holiday, or you can take pastel colors of yarn and knit a casual handbag.

To crochet a handbag we will need:
- Yarn (green and crimson);
- Hook;
- Strap chain;
- Lightning;
- Needle.
We will knit the bag in the round. And first, let's make a chain of loops. The number of loops in this chain should be divided by three.

Now we knit one row with single crochets. And we knit it like this. First one side, and then without any increases we move to the other side and knit it.

Having skipped one loop at the base, in the next we knit two double crochets again. And so on until the end in a circle.

Now let's replace the thread with crimson. But there is no need to tear off the green one, since the color of the rows will continue to alternate. Actually, the row patterns too.
We make a yarn over the hook and pull it out a little to the level of about two lifting loops.
We stick the hook into the point where the thread comes out. And also pull out the working thread to the level of our first elongated loop. Repeat four more times. That is, we did the same action only five times.

Pull the working thread through all the loops on the hook and secure it with two chain loops.
Now we will knit such cone elements all over the circle. And we knit them only in the middle of the “V” pattern.

We will start the new row with green yarn. And we will knit the “V” pattern in it. We knit it between the cones that we knitted in the previous row.

We knit the desired height of the bag.

Now we will knit single crochets with green yarn. We knit three to five rows. And we will knit the first of them only between the cones. Two stitches per loop.
We sew in a zipper. And on the sides we attach a chain or any other strap.
You can sew a lining inside. But you can leave it like that.
This is such a bright and juicy crocheted handbag!

And for young mothers this will be useful:

More knitted handbags for girls
And more master classes on beautiful knitting for girls on our website:
White-pink and tricolor -

Green handbag with flower -

Pouch bag with cone pattern -


And another fun crocheted summer backpack -

Did you like the product and want to order the same from the author? Write to us.
More interesting:
See also:
DIY children's backpack and change bag made from jeans
Master classes on how to sew a children's backpack and change bag from jeans were prepared for you by Anna Shishl...
Handbag for girls (crocheted). Master class with diagrams
New addition to our collection of accessories for girls is a new crocheted handbag. Master class and...
Our doll bag looks amazing on Barbie, Moxie and any other doll of this type. It is important to choose the right size for the base of the handbag – the mug.
To knit a bag for a doll you will need:
hook No. 1,2
Estamin threads or iris in two colors - white and yellow.
Knitting density – 5 stitches. b/n by 1 cm.
The doll's handbag, shown in the top photo, consists of a circle folded in half and a handle.

This is how it fits.
1st row – close 5 air loops into a ring.
Row 2 – tie the ring with ten single crochets.
Rows 1 and 2 can be knitted with either yellow or white thread if desired. Then we continue to knit, certainly from yellow.
3rd row – 2 columns each. b/n in each loop of the previous row.
Row 4 – knit a single stitch into each stitch of the previous row.
5, 6 row – 2 columns. b/n in 1 loop, 1 column. b/n, 2 columns. b/n in 1 loop, 1 column. b/n and so on until the end of the row.
Row 7 – a row of single crochets.
8th row – 2 columns each. b/n in every 5th loop of the previous row; the rest are knitted “loop to loop”.
9th row – 3 columns each. b/n in every 6th loop of the previous row; the remaining loops are knitted “loop to loop”.
Row 10 – a row of single crochets.

11th row - a row of single crochets is knitted with white threads.
Row 12 – yellow thread again – 2 columns each. b/n in every 5th loop of the previous row, the rest are knitted “loop to loop”. No need to cut the thread!

Lay out your circle and sew white lines around it, like lemon slices:

Fold the circle in half so that the thread is in the corner of the semicircle. Start tying, grabbing both halves, over the edge with single crochets, as can be seen on the finished handbag in the photo below:
You need to knit about a third of the semicircle arc (do not cut the thread!). Then we move on to knitting an air chain of the required length (this will be the handle of our handbag) - I got 44 loops. Then, having measured another third of the semicircle arc (the unsewn hole in the bag), we knit the remaining arc to the corner of the semicircle. Don't forget to thread the thread - and your doll bag is ready!
In summer you want something new and unusual. Our regular author Anna the needlewoman presents two more crocheted summer handbags.
Sea bag
In this master class we will crochet a stylish summer bag in a nautical style. This bag is perfect for everyday walks and for the beach. And it is knitted on the basis of a square with ordinary double crochets.
To knit a bag we will need:
- Yarn of two colors;
- Hook.
You can knit a bag from the yarn you like. First we knit the bottom from blue yarn. This is an ordinary square. Let's make the bottom one color.
We make a sliding loop. Then, instead of the first double crochet (DC), we will cast on 3 air loops (VP). Next, we will start each row with 3 loops instead of a stitch.
And repeat 3 more times 3 dc and 2 ch. At the end, we connect the knitting and tighten the sliding loop. We got a square, which we will further expand with the help of increases in 4 places of each row.
In the corners we have 2 VPs. We will make improvements to them. To do this, we knit 1 dc above each dc. Next, under 2 VPs, we always knit 2 Dcs, 2 VPs and 2 Dcs in all rows. This is how increments are formed. We connect the rows. And for convenience, we pass under the VP with connecting posts to start knitting with increases.
We knit the bottom of the bag of the required size.

Then we will knit 3 rows with white yarn and 1 row with blue yarn. But now we need to make both increases and decreases. To do this, we knit the 1st increase as usual in the corner. And then we count the number of lower CCHs. Subtract 5 loops. And divide the remaining amount by 2. Knit the resulting number of dcs.
Now let's turn it down. To do this, we do not tie the next CCH. We skip the next column and again do not complete the dc. Again we skip 1 column from the bottom and do not knit the next one.
We knit these columns with 1 loop.
This is how we gain the height of the bag.
It is best to finish knitting in blue. And now we will knit the first handle from the corner. We cast on from 70 to 100 loops. We attach the chain to the 2nd corner.
We unfold the knitting and skip 2 loops in the handle, knit further with a DC and at the end join the 2nd loop of the base of the bag.
We knit 1 more handle in the same way.
The summer crochet bag in a nautical style is ready!
Knitted handbag, crocheted
A woman always wants to stand out from the crowd. And he uses various accessories for this. In this master class we will knit one of these accessories, namelybright crochet handbag. This bag doesn't take long to knit. But it looks very elegant and festive. You can combine any colors you like in it. You can knit it for a bright holiday, or you can take pastel colors of yarn and knit a casual handbag.
To crochet a handbag we will need:
- Yarn (green and crimson);
- Hook;
- Strap chain;
- Lightning;
- Needle.
We will knit the bag in the round. And first, let's make a chain of loops. The number of loops in this chain should be divided by three.
Now we knit one row with single crochets. And we knit it like this. First one side, and then without any increases we move to the other side and knit it.
Having skipped one loop at the base, in the next we knit two double crochets again. And so on until the end in a circle.

Now let's replace the thread with crimson. But there is no need to tear off the green one, since the color of the rows will continue to alternate. Actually, the row patterns too.
We make a yarn over the hook and pull it out a little to the level of about two lifting loops.
We stick the hook into the point where the thread comes out. And also pull out the working thread to the level of our first elongated loop. Repeat four more times. That is, we did the same action only five times.
Pull the working thread through all the loops on the hook and secure it with two chain loops.
Now we will knit such cone elements all over the circle. And we knit them only in the middle of the “V” pattern.

We will start the new row with green yarn. And we will knit the “V” pattern in it. We knit it between the cones that we knitted in the previous row.

We knit the desired height of the bag.
Now we will knit single crochets with green yarn. We knit three to five rows. And we will knit the first of them only between the cones. Two stitches per loop.
We sew in a zipper. And on the sides we attach a chain or any other strap.
You can sew a lining inside. But you can leave it like that.
This is such a bright and juicy crocheted handbag!
And for young mothers this will be useful:
More knitted handbags for girls
And more master classes on beautiful knitting for girls on our website:
White-pink and tricolor -
Green handbag with flower -
Pouch bag with cone pattern -
And another fun crocheted summer backpack -
Did you like the product and want to order the same from the author? Write to us.
More interesting:
See also:
DIY children's backpack and change bag made from jeans
Master classes on how to sew a children's backpack and change bag from jeans were prepared for you by Anna Shishl...
Handbag for girls (crocheted). Master class with diagrams
New addition to our collection of accessories for girls is a new crocheted handbag. Master class and...
I promised to prepare master classes for several sets of clothes for Kruselings dolls, with which I participated in a competition organized by the FTK-Toys company, published a description of knitting a summer hat, and I completely ran out of free time. Now I have a very interesting order in the works for an outfit for a vintage doll, and “Mistress of the Prairie” as described by Oksana Lifenko, I have not yet finished knitting, and the set of clothes for the Maru and friends dolls is still in progress, so I just can’t get it in order patterns and publish MK for a tunic, trousers and sandals. But I still prepared a description of the knitted set for publication, and I also took part in the competition with it.
I used Pelican yarn (330m=50g) in three colors: 4004 brown, 3980 magenta, 3951 white and a 1.3mm crochet hook. But, in my opinion, even this yarn is too thick for such small dolls. It is better to use it when knitting, then you get a thinner fabric.
The outfit is very easy to make; even a beginner knitter can knit it.
The outfit uses knitting in the back half-loop of the previous row; as a result of this technique, an imitation of the pleats of a pleated skirt is obtained. My baby friend Delena once taught me this little trick; I saw such a skirt on her doll for the first time. The same technique is used as the basis for knitting a hat and a handbag in the proposed set.
We start knitting with a skirt
Conditional abbreviations:
VP - air loop
sc - single crochet
psbn - half crochet
Dress

1 row: from pink yarn, knit a chain of 15 ch, make a sc in the second loop from the hook, 13 sc in each subsequent loop, 1 ch rise.
2nd row
3-90 rows: repeat row number 2.
We got a long rectangle with vertical stripes, a total of 45 folded stripes. On the narrow side the length is 3 - 3.5 cm.
Fold the rectangle crosswise and using psbn sew the skirt from bottom to top, fasten and cut off the pink thread.
1 row: Attach a brown thread using a sc, use a brown thread to tie 45 sc along the top edge of the pink skirt, a connecting hdc in the first stitch of the row to close it in a circle, ch 1 instep. Insert the hook into the side of the sc every second row. The skirt consists of 90 rows = 45 folds, that is, you need to knit one sc in each fold with brown thread.
2nd row: 45 sc, connecting psc in the lifting loop, fasten and cut off the brown thread. Here, continue to knit in the usual way, inserting the hook under both half-loops of the previous row.
3rd row: Attach the white thread using sc, 45 sc, 1 ch instep. Starting from this row, we no longer knit in the round, but turn the knitting after each row.
4 - 8 rows: 45 sc, 1 ch rise.
9 row: 10 sbn, 2 sbn with a common top, 21 sbn, 2 sbn with a common vertex, 10 sbn, 1 ch rise (2 decreases).
10 - 14 rows: 43 sbn, 1 ch rise.
15 row: 9 sbn, 2 sbn with a common top, 21 sbn, 2 sbn with a common vertex, 9 sbn, 1 ch rise (2 decreases).
16 row: 41 sbn, 1 ch rise.
17 row: 9 sbn, 2 sbn with a common top, 19 sbn, 2 sbn with a common vertex, 9 sbn, 1 ch rise (2 decreases).
18 - 19 rows: 39 sc, 1 ch rise.
20 row: 9 sbn, 2 sbn with a common top, 17 sbn, 2 sbn with a common vertex, 9 sbn, 1 ch rise (2 decreases).
21 row: 37 sc, 1 ch rise.
22 row: 6 sc, 15 ch, skip 5 loops, 14 sc, 15 ch, skip 5 loops, 6 sc, 1 ch rise. Sleeve armholes appeared in this row.
23 row: 6 sbn, 15 sbn in the loops of the VP chain, 14 sbn, 15 sbn in the loops of the VP chain, 6 sbn, 1 VP rise.
24 row: 6 sbn, 2 sbn with a common top, 11 sbn, 2 sbn with a common vertex, 14 sbn, 2 sbn with a common vertex, 11 sbn, 2 sbn with a common vertex, 6 sbn, 1 ch rise (4 decreases).
25 row: 5 sbn, 2 sbn with a common top, 11 sbn, 2 sbn with a common vertex, 12 sbn, 2 sbn with a common vertex, 11 sbn, 2 sbn with a common vertex, 5 sbn, 1 ch rise (4 decreases).
26 row: 5 sbn, 2 sbn with a common top, 9 sbn, 2 sbn with a common vertex, 12 sbn, 2 sbn with a common vertex, 9 sbn, 2 sbn with a common vertex, 5 sbn, 1 ch rise (4 decreases).
27 row: 5 sbn, 2 sbn with a common top, 8 sbn, 2 sbn with a common vertex, 10 sbn, 2 sbn with a common vertex, 8 sbn, 2 sbn with a common vertex, 5 sbn, 1 ch rise (4 decreases).
28 row: 5 sbn, 2 sbn with a common top, 7 sbn, 2 sbn with a common vertex, 8 sbn, 2 sbn with a common vertex, 7 sbn, 2 sbn with a common vertex, 5 sbn, 1 ch rise (4 decreases).
Row 29: 4 sbn, 2 sbn with a common top, 6 sbn, 2 sbn with a common vertex, 8 sbn, 2 sbn with a common vertex, 6 sbn, 2 sbn with a common vertex, 4 sbn, 1 ch rise (4 decreases). Cut and fasten the white thread.
We’ll return to tying the neckline and knitting the collar later.
Let's move on to knitting sleeves
1 - 14 rows: Attach a white thread in the armpit area using a hdc, 20 hdc, a connecting hdc in the first hdc of the previous row, ch 1 rise. To avoid sewing the sleeve, I knitted in the round without turning the knitting. You can knit without using a connecting psc and a lifting loop, just in the round.
15 row: 2 sbn with a common top, 18 sbn, connecting psbn in the first sbn of the previous row, 1 ch rise.
16 row: 17 sbn, 2 sbn with a common top, connecting sbn in the first sbn of the previous row, 1 ch rise.
17-21 rows: 18 sbn, connecting psbn in the first sbn of the previous row 1 ch rise. Cut and fasten the white thread.
22 row: attach the brown thread using sc, 18 sc, connecting hdc to the first sc of the previous row of ch 1 rise. Cut and fasten the brown thread.
23 row: attach the pink thread using sc, 18 sc, connecting hdc to the first sc of the previous row, ch 1 rise.
24 row: 18 sbn, connecting psbn in the first sbn of the previous row 1 ch rise. Cut and fasten the pink thread.
The second sleeve is knitted exactly the same as the first. Sleeve length 5-5.5 cm.

Let's move on to knitting a collar.
The collar consists of two halves, each knitted separately.
1 row: Knit this row behind the top half-loop of the previous row, because we will need the lower half-loop for tying with brown thread. Attach the pink thread using sc, 4 sc, 2 sc in the next loop, 6 sc, 2 sc in the next loop, 4 sc, 1 ch rise,
2nd row: 5 sbn, 2 sbn in the next loop, 6 sbn, 2 sbn in the next loop, 5 sbn, 1 ch rise.
3rd row
4 row: skip the first loop, 4 sbn, 2 sbn in the next loop, 8 sbn, 2 sbn in the next loop, 4 sbn, leave the last loop undone, 1 ch rise.
5 row: skip the first loop, 4 sc, 2 sc in the next loop, 8 sc, 2 sc in the next loop, 4 sc, leave the last loop undone.
Repeat rows 1-5 for the second half of the collar. Then tie both halves along the bottom edge with single crochets. On the chest, at the junction of the collar halves, I made an imitation of strings; they have a purely decorative function and are knitted as follows:
tie a chain of 8 ch, psc at the junction of the collar halves, 8 ch, cut and fasten the thread. You can tie decorative knots at the ends of the chains or secure beads.

Tie the neck with brown thread in single crochets using the lower half-loops, which we deliberately left free when knitting the collar.
All that remains is to make the clasp on the back. I used three micro buttons with a diameter of 5mm, but if you don't have such small buttons, you can use small beads as buttons. Tie the edge of the dress in single crochets with white thread in the place where the clasp will be. The edges of my dress meet end-to-end; I did not make an overlapping fastener, because the extra thickness is very noticeable for such small dolls and makes the dress look like a coat. Buttonholes consist of three VPs, but the number of VPs must be selected experimentally, depending on the size of the buttons.

Knitting a hat.
1 row: Using a pink thread, knit a chain of 15 ch, sc in the second loop of the chain, 13 sc, 1 ch rise.
2nd row: 14 sc, 1 ch rise. Insert the hook under the back half-loop, leaving the front half-loop unused.
3-52 rows: repeat row number 2.
Sew the cap along the sides using psbn, fasten and cut off the pink thread.
The cap at the moment is a pipe with holes of the same diameter, the hole for the ponytail of hair needs to be cut, to do this you need to tie the edge of the cap with single crochets, inserting a hook into every second row, a total of 26 sc. Connect the row using a psc, fasten and cut off the brown thread.
Attach a white thread and make 26 sc with a white thread. Connect the row using psc, cut and fasten the thread.

Knitting handbags.
The handbag has the shape of a barrel lying on its side. It consists of three separate parts: 2 circles (the bottom and lid of the barrel) and 1 rectangle (the walls of the barrel).
First we knit a rectangle with brown thread.
1 row: Using a pink thread, knit a chain of 14 ch, sc in the second loop of the chain, 12 sc, 1 ch rise.
2nd row: 13 sbn, 1 ch rise. Insert the hook under the back half-loop, leaving the front half-loop unused.
Rows 3-28: repeat row number 2.
Fasten and cut the brown thread.
We knit two circles as follows:
1 row: 2 ch, 6 sc in second loop from hook.
2nd row: 2 sc in each loop.
3rd row: (1 sc, 2 sc in next loop)* repeat 6 times.
Fasten and cut the white thread.
Using psbn with pink thread, connect the walls of the barrel with the lid and bottom.
The bag we are knitting is quite functional; you can put some small things in it, so we leave a hole in the wall of the barrel for storing items or putting a kitten in the bag. This hole needs to be tied with pink thread.

Handbag handles.
Attach the pink thread using sc to the wall of the barrel, ch 23, hdc into the barrel wall on the other side, turn the knitting, 23 hdc into the loops of the chain, fasten and cut the thread. Repeat everything for the second handle.
Handbag clasp:
Attach a white thread using sc into the wall of the barrel between the attachment points of one handle, 16 ch, sc in the sixth loop from the hook, 10 sc in the remaining loops of the chain, fasten and cut the thread.

Sew on a button or bead for fastening. The size of the loop for the fastener is selected empirically, depending on the size of the button or bead, for me it is 5 ch, yours may be more or less.

Gaiters
This is the simplest thing that can happen in nature.
1 row: 11 ch, sc in the second loop from the hook, 9 sc in the remaining loops of the chain, 1 ch instep.
2 - 20 rows: 10 sc for the back half loop, 1 ch instep.
Fold in half and sew using psbn, fasten and cut the thread.

Happy knitting! Let your dolls be beautiful!

I don’t know what happened to me... I just knitted one handbag for my niece’s birthday (she’s not in the photo). Then for some reason I decided that I needed to knit handbags in all the colors of the rainbow. Here is the result! I can write descriptions if desired, I wrote everything down. VITA cotton COCO threads 100% mercerized cotton 50 g/240 m, 2 mm hook, some beads and a button for a backpack.
Here are the descriptions:
Bag "Spiral"
Amigurumi ring
1 row - 3 tbsp. b/n /white/, 3 tbsp. b/n /purple/ (6)
2nd row - 3 ave. /white/, 3 ax. /purple/ (12)
3rd row - (ex., 1 tbsp. b/n) x 3 /white/, 3 (ex., 1 tbsp. b/n) x 3 /purple/ (18)
4th row - (ex., 2 tbsp. b/n) x 3 /white/, 3 (ex., 2 tbsp. b/n) x 3 /purple/ (24)
5th row - (ex., 3 tbsp. b/n) x 3 /white/, 3 (ex., 3 tbsp. b/n) x 3 /purple/ (30)
6th row - (ex., 4 tbsp. b/n) x 3 /white/, 3 (ex., 4 tbsp. b/n) x 3 /purple/ (36)
7 row - (ex., 5 tbsp. b/n) x 3 /white/, 3 (ex., 5 tbsp. b/n) x 3 /purple/ (42)
8th row - 42 st. b/n for back p/p /purple/ (42)
Row 9 - 42 st. b/n /purple/ (42)
Knit the second part in the same way, only when knitting the 9th row you need to attach the first part and leave several loops connected. Here is one connecting parts.
Strap.
Dial 49 v. P.
1st row - in the 3rd century. clause 1 art. s/n, 46 tbsp. s/n (47)
Fringe.
Attach threads of yarn in one fold using the free half-loops along the edge. /white/
Bag "Light green summer"
Dial 8 v. p. /light green/ Knit in the round.
1st row - in the 2nd century. clause 2 art. b/n, 5 tbsp. b/n, in the 8th century. clause 3 art. b/n, 6 tbsp. b/n, (16)
2nd row - 2 ave., 5 tbsp. b/n, 3 ave., 5 tbsp. b/n, 1 ave. (22)
3rd row - (1 tbsp. b/n, 1 tbsp.) x 2.5 tbsp. b/n, (1 tbsp. b/n, 1 pr.) x 3, 6 tbsp. b/n, 1 ave. s. With. (28)
4 row - 1 st. p.p., 27 concave. Art. b/n (28)
5 - 11 row - according to the diagram 
Handle - 17 p. flat cord made of st. b/n.
Bag "Scarlet Sunset"
Dial 21st century. n. Knit in straight and reverse rows.
1st row - in the 2nd century. clause 1 art. b/n, 18 tbsp. b/n, in the 10th century. clause 3 art. b/n, 20 tbsp. b/n, (43)
2nd row - 1st century. p.p., 19 art. b/n, 3 ave., 20 tbsp. b/n (46)
3rd row - 1st century. p.p., 19 art. b/n, (1 st., 1 tbsp. b/n) x 3, 20 tbsp. b/n (49)
4 row - 1 st. p.p., 20 tbsp. b/n, (1 st., 2 tbsp. b/n) x 3, 19 tbsp. b/n (52)
5th row - 1st century. p.p., 21 art. b/n, (1 st., 3 tbsp. b/n) x 3, 18 tbsp. b/n (55)
6th row - 1st century. p.p., 22 tbsp. b/n, (1 st., 4 tbsp. b/n) x 3, 17 tbsp. b/n (55)
7th row - 1st century. p.p., 23 art. b/n, (1 st., 5 tbsp. b/n) x 3, 16 tbsp. b/n (55)
8 row - 1 st. p.p., 24 art. b/n, (1 st., 6 tbsp. b/n) x 3, 15 tbsp. b/n (55)
Tie the end st. b/n.
Sew the sides. Steam the bag. You can make a handle from a chain.
Bag "Tick"
2nd row - 2 ave., 6 tbsp. b/n, 3 ave., 6 tbsp. b/n, 1 ave. (24)
3rd row - (1 tbsp. b/n, 1 tbsp.) x 2, 6 tbsp. b/n, (1 tbsp. b/n, 1 pr.) x 3, 7 tbsp. b/n, 1 ave., s. With. (thirty)
4th row - 3rd century. p.p., 29 art. s/n for back p/p (30)
5 - 9 row - "Tick" pattern (30)
10 - 11 row according to the scheme 
Strap.
Dial 40 v. p. /pink/
1st row - in the 3rd century. clause 1 art. s/n, 37 tbsp. s/n (38)
Attach to the bag in any available way.
Flower.
How many amigurumi /white/. Knit in the round.
Row 1 - (1 dc, 1 ch, 2 dc, 1 ch) x 5, p. With.
Leave the tails for sewing.
Tie a chain from c. according to the girth of the bag /white/.
Thread 10 rows through the holes and secure. Sew on a flower.
Backpack "Hello Kitty"
Dial 9 v. p. /pink/ Knit in the round.
1st row - in the 2nd century. clause 2 art. b/n, 6 tbsp. b/n, in the 9th century. clause 3 art. b/n, 7 tbsp. b/n, (18)
2nd row - 2 ave., 6 tbsp. b/n, 3 ave., 6 tbsp. b/n, 1 ave., s. With. (24)
3rd row - 3rd century. p.p., 23 art. s/n for back p/p (24)
4 - 8 row - 3 in. p.p., 23 art. s/n
Valve.
Dial 10 v. p. /pink/ Knit in straight and reverse rows.
1st row - in the 2nd century. clause 1 art. b/n, 7 tbsp. b/n, in the 10th century. clause 3 art. b/n, 8 tbsp. b/n, (19)
2nd row - 1st century. p.p., 7 tbsp. b/n, 3 ave., 8 tbsp. b/n (22)
3rd row - 1st century. p.p., 7 tbsp. b/n, (1 st., 1 tbsp. b/n) x 3, 8 tbsp. b/n (25)
4 row - 1 st. p.p., 8 tbsp. b/n, (1 st., 2 tbsp. b/n) x 3, 7 tbsp. b/n (28)
5th row - 1st century. p.p., 9 tbsp. b/n, (1 st., 3 tbsp. b/n) x 3, 6 tbsp. b/n (31)
Tie the end st. b/n.
Straps.
Dial 32 v. p. /pink/
1st row - in the 3rd century. clause 1 art. s/n, 29 tbsp. s/n (30)
Knit 2 parts.
Kitty.
Dial 4 v. p. /white/
1st row - in the 2nd century. clause 2 art. b/n, 1 tbsp. b/n, in the 4th century. clause 3 art. b/n, 2 tbsp. b/n, (8)
2nd row - 2 ave., 1 tbsp. b/n, 3 ave., 1 tbsp. b/n, 1 ave. (14)
3rd row - (1 tbsp. b/n, 1 tbsp.) x 2, 1 tbsp. b/n, (1 tbsp. b/n, 1 pr.) x 3, 2 tbsp. b/n, 1 pr. (20)
Row 4 - (2 tbsp., 1 tbsp.) x 2, 1 tbsp. b/n, (2 tbsp. b/n, 1 pr.) x 3, 3 tbsp. b/n, 1 ave. (26)
Row 5 - (3 tbsp., 1 tbsp.) x 2, 1 tbsp. b/n, (3 tbsp. b/n, 1 ave.) x 3, 4 tbsp. b/n, 1 ave. (32)
Ears.
Attach a new thread./white/ Knit according to the pattern 
Embroider eyes and nose. Sew all the details and a small button onto the valve.
Bag "Cloud"
Dial 14 v. p. /white/ Knit in the round.
1st row - in the 2nd century. clause 2 art. b/n, 11 tbsp. b/n, in the 14th century. clause 3 art. b/n, 12 tbsp. b/n, (28)
2nd row - 2 ave, 11 tbsp. b/n, 3 ave., 11 tbsp. b/n, 1 ave., s. With. (34)
3rd row - 3rd century. p.p., 33 art. s/n for back p/p (34)
4 row - 1 st. p.p., 33 art. b/n (34)
Row 5 - turn knitting, 3 in. p.p., (1 st. s/n for the front p/n, 1 ch. p., 1 tbsp. s/n for the front p/n, 1 ch. p.) in one loop, (1 tbsp. s/n for the front p/n, 1 ch.) x 16, (1 st. s/n for the front p/n, 1 ch. p., 1 st. s/n for the front p/n, 1 v. p.) in one loop, (1 treble s/n behind the front p/p, 1 v. p.) x 15 (34)
Rows 6 - 11 - repeat rows 3 - 5 2 times
12 - 14 row - 1 st. p.p., 33 art. b/n (34)
Row 15 - 4 s. s., 1 tbsp. b/n, over 9 loops - 21 p. flat cord from st. b/n, 1 tbsp. b/n, 6 p. s., 1 tbsp. b/n, over 9 loops - 21 p. flat cord from st. b/n, 1 tbsp. b/n, 2 p. With.
Bag "Black Square"
First you need to string beads onto the yarn. Master Class . The beads are turned out on the wrong side.
Dial 14 v. P.
1st row - 28 tbsp. b/n (tie 14 chain stitches on both sides) (28)
2nd row - 28 st. b/n for back p/p (28)
3rd row - 14 tbsp. non-cash with beads, 14 tbsp. b/n (28)
4 row - 28 st b/n (28)
Repeat rows 3-4 5 times
15 row - 3 tbsp. b/n, 4 tbsp. b/n with beads, 4 in. p. over 4 loops, 1 tbsp. b/n, 4 tbsp. non-cash with beads, 12 tbsp. b/n (28)
16th row - 28 st. b/n (28)
The photo shows that in the rows with beads st. The b/n needs to be shifted a little so that the bearer is on only one side.
Bag "Shell"
Dial 18th century. n. Knit in straight and reverse rows.
1st row - in the 2nd century. clause 1 art. b/n, 1 tbsp. b/n, 1 p/st. s/n, 9 tbsp. s/n, 1 p/st. s/n, 3 tbsp. b/n (17)
2nd row - 1st century. p.p., 2 tbsp. b/n, (1 p/st. s/n, 9 tbsp. s/n, 1 p/st. s/n) for the back p/n, 3 tbsp. b/n (17)
3 - 13 row - repeat 2nd row
Tie separately the ends of the st. b/n. /yellow/ Knit in straight and reverse rows.
1 row - 1 st. p.p., 13 art. b/n (14)
2nd row - 1st century. p.p., 1 tbsp. b/n, ub. 2 tbsp. b/n. ub. 2 tbsp. b/n, ub., 2 tbsp. b/n (11)
3rd row - 1st century. p.p., 10 tbsp. b/n, 18th century. item (29)
Attach to. n. handles to the opposite side of the end, repeat on the other side.
Tie the entire bag in a circle along with the handles. b/n. /yellow/
Bag "Marine"
Dial 16 v. p. /blue/ Knit in the round.
1st row - in the 2nd century. clause 2 art. b/n, 13 tbsp. b/n, in the 16th century. clause 3 art. b/n, 14 tbsp. b/n, s. With. (32)
2nd row - 3rd century. p.p., 31 art. s/n for back p/p (32)
3rd row - 3rd century. p.p., 31 art. s/n /white/ (32)
4th row - 3rd century. p.p., 31 art. s/n /blue/ (32)
5th row - 3rd century. p.p., 31 art. s/n /white/ (32)
6th row - 3rd century. p.p., 31 art. s/n /blue/ (32)
7th row - 3rd century. p.p., 31 art. s/n /white/ (32)
8 row - 1 st. p.p., 7 tbsp. non-cash, 6 loops 16 in. p., 10 tbsp. non-cash, 6 loops 16 in. p., 2 tbsp. b/n /blue/ (52)
Row 9 - 52 s. With. (52)
Bag "Orange"
Amigurumi ring
1 row - 6 tbsp. b/n (6)
2nd row - (1 tbsp, etc.) x 6 /white/ (12)
3rd row - (2 tbsp. b/n, etc.) x 6 /orange/ (18)
4th row - (3 tbsp. b/n, etc.) x 6 (24)
5th row - (4 tbsp. b/n, etc.) x 6 (30)
6th row - (5 tbsp. b/n, etc.) x 6 (36)
7 row - (6 tbsp. b/n, etc.) x 6 (42)
8 row - (7 tbsp. b/n, etc.) x 6 (48)
9 row - (8 tbsp. b/n, etc.) x 6 (54)
10 row - (9 tbsp, etc.) x 6 (60)
11th row - (5 tbsp, pull a loop through the middle of the circle + 1 tbsp with one top) x 6 /white/ (60)
12 row - (10 tbsp. b/n, etc.) x 6 /orange/ (66)
Fold in half, tie 10 stitches. Art. b/n, connecting opposite loops, knit the handle with a “caterpillar” cord of the desired length, skip 13 sts, 10 stitches. Art. b/n.
Twisted st. b/n knitted.
Perhaps if you knit a bag st. s/n, maybe faster and softer.
Abbreviations
V. p.p. - lifting air loop
V. p. - air loop
vog. Art. b/n - concave single crochet
p/p - half loop
p/st. s/n - half double crochet
etc. - increase, 2 single crochets in 1 loop of the previous row
With. With. - connecting post
Art. b/n - single crochet
Art. s/n - double crochet
skr. Art. b/n - twisted single crochet
ub. - decrease, 2 tbsp. b/n with one top
[...] x n - repeat n times
I apologize for the inaccuracies in the description.
Thanks everyone for your attention!