On Teacher's Day, each student strives to express his gratitude by congratulating his teacher on such an important event, delighting him with his gift. It remains only to choose a suitable present and solemnly hand it to the teacher on a significant day. original and beautiful gift You can create your own hands on your own or with the help of parents. Gifts made with my own hands, reflect the warmth and care that you want to express to your beloved teacher, who has invested experience and knowledge in his students. Flowers, postcards, sweet desserts and other gifts are traditionally given on Teacher's Day.
But to really please and surprise the teacher, you can create your own gift, for example, from plain paper or stationery.
Hand-made presents are much more valuable than store-bought ones, as they keep the warmth of the hands and emotions of the creator. What are the gifts self made bring your teacher only quivering and bright feelings?
DIY gift for teacher's day - what to give
6 most exclusive DIY gifts for Teacher's Day
1. Paper postcard
The owl is considered an intelligent, insightful and wise bird. These qualities are present in teachers, so a paper card with the image of an owl will become one of best gifts on holiday.
Necessary materials:
- several sheets of colored paper;
- scarp paper or other type of decorative paper;
- satin ribbon;
- cardboard;
- pencil, scissors and glue.
Performance:
1. Pre-prepare an owl figurine. To do this, cut it out according to a template from plain paper or cardboard.
2. Then transfer the finished figure to thick cardboard and scrap paper, mark up and cut out along the contour. Glue the resulting parts from the wrong side.
3. Decorate the inside and outside of the owl with colored paper. Attach the wings cut out according to the template to the scrap paper, mark the outline and cut it out. Finished wings, attach the clamp to inner surface blanks.
4. With curly scissors from the template, cut off the next part - the head. Attach the part to colored paper, cut out the office, install on the inside of the workpiece.
5. It remains to cut out the owl's body. To do this, cut out the desired part from the template and apply it to colored paper. We outline the lines of the body and cut it out, but not along the contour itself, but 1 cm closer to the center. The finished part should be slightly smaller than the original sample.
6. The last step is to cut and paste the eyes and beak. We attach the ribbon. It turns out a nice postcard - an owl, which remains only to be signed and presented.

2. Photo collage with wishes
Photos store the memory and impressions of past events, so a photo collage is great idea for a gift that children of any age can bring to life.
To implement the idea, you will need:
— whatman paper large sizes;
- photos;
- plywood for the substrate;
- frame with glass;
- pictures with the theme of the holiday;
- bed colors;
- universal glue.
Making a photo collage:
1. Let's prepare a congratulation for the teacher. If there are 25 students in the class, then there should be the same number of words in the wish. All words from the congratulations must be printed on different sheets.
2. Each student is photographed with one of the words of the congratulation text. Photos are printed on a color printer.
3. If the paper is white, then paint it with paint light shades. It is not recommended to use very saturated tones, as they will take all the attention from the contents of the photo collage.
4. We paste photographs on the finished paper, placing them in the correct order. It will look interesting and unusual if the photographs are arranged asymmetrically, for example, one is a little higher, the other is lower.

5. Empty areas are filled with printed decorative elements: leaves, roses, feathers.
6. After thorough drying of the photo collage, we fix it in the frame, install glass on top.
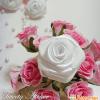
3. Vase of pencils with flowers
You can give flowers in a very original way. To do this, we will make a vase using improvised materials.
Required:
- a jar of tin or a cylinder of cardboard from toilet paper;
- pencils or crayons of various colors;
- ribbons, decorative flowers and other elements;
- real or artificial flowers;
- several sheets of colored paper with a colorful design;
- elastic band for fasteners;
- scissors.
Work plan:
1. Prepare a tin vessel or a cardboard sleeve in advance. If a roll is used in the manufacture, then it is necessary to glue a circle to its base, which will serve as the bottom of the vase.

2. Next, we cover the prepared blank on all sides with pencils or crayons, pressing them tightly against the future vase. We put pencils and crayons exactly in an upright position or slightly tilted to the side. We fix them tightly with an elastic band in the middle. If the crayons are small, then glue the rest with colored paper with decor.
3. With the help of a tape, we hide the elastic band that holds the entire structure. To do this, we wrap the entire vase with a ribbon. You can also use flowers and other decorations to decorate the vessel.
4. Place an artificial bouquet or real flowers in the finished vase. If the choice fell on fresh flowers, then you can apply a little trick: we install a glass at the bottom of the jar, in which water for the plants will subsequently be poured.

So the bouquet will stand longer and decorate the teacher's table. It is worth noting that it is necessary to pour water into a vase after presenting a gift so that it does not accidentally spill onto the teacher's outfit.
4. Posters for the holiday
Posters and wall newspapers are a great decoration for any classroom. Such a gift will be very useful on Teacher's Day. He expresses recognition and respect for his teacher.
A wall newspaper can be made using different techniques. For example, drawing, collage. Additionally, it can be decorated with thematic bright applications, use various elements decor (flowers, ribbons, beads, lace, dried flowers).
A poster or a wall newspaper can be made in an unusual way, for example, designed like a blackboard.

List of materials:
- picture frame;
- various shades corrugated paper;
- a piece of black paper that matches the size of the frame;
- a set of colored pencils;
- a white marker or felt-tip pen.
Project implementation:
1. First prepare the frame by evenly painting it with paint. Instead of painting, you can paste over the surface with a self-adhesive film. Next, on the resulting black background, draw warm and good words white marker.
2. The next step is making the leaves. To do this, cut a rectangle approximately 30 by 15 cm from a regular landscape sheet. Fold it in half, cut the edges of the paper in the shape of maple leaves with scissors, thus forming a carved edge. Ready template attach to a sheet of colored or wrapping paper and cut out three parts.
3. Gently fold each figurine with an accordion, starting from the wider edges. Secure them with a stapler in the middle. Gently bend the pieces so that the wide edges touch each other. The edges must be fastened together, align the paper, thus obtaining a maple leaf.
4. It remains to make a rose. For its manufacture, corrugated paper is useful, from which it is necessary to cut 8 rectangles measuring 4 by 6 cm. The longest part of the rectangle should be parallel to the fold of the paper sheet. Take a pencil and wrap it with the resulting details, squeeze it like a spring. We expand each rectangle separately, slightly stretching it across, getting rid of the formed folds, forming a petal of the future rose. Give one of the petals the shape of a bud. Collect the rose: glue all the petals to the bud.
5. The last stage is the decoration of the “school board” poster with the resulting leaves and a rose.
5. Tree with congratulations
Even a student can build such a present lower grades. For the project, you can purchase a set of ready-made parts, on which wishes are subsequently written. Additionally, the set includes paints and pens for painting details.
Necessary materials:
— details of the wish tree;
- paints (if they are not provided in the set);
- pen (if not included).
Let's get started:
1. Prepare wood blanks by taking them out from under the glass.
2. We offer each pupil from the class to dip his finger in the paint and attach it to a wooden blank, leave his imprint.

Write a few words to the teacher with a pen.
3. When all classmates have completed this task, the blank is framed and closed with a sheet of glass.
6. A pen with a sweet surprise
The most basic tool for any teacher is a pen. With the help of it, he puts marks in the journal and diary, checks control and homework assignments. A simple and nondescript pen can be turned into a chocolate one by decorating it with delicious chocolates.
To make a chocolate pen you will need:
- pencil;
- corrugated paper of a bright shade;
- small chocolates or sweets;
- a sheet of thick cardboard;
- scissors;
Assembling the pen:
1. The pencil must be pasted over with corrugated paper. Gradually decorate the pencil with chocolate products. Pay attention to sweets: first of all, they should all be the same size, have a round or rectangular shape.

2. To decorate the tip of the pen, cardboard is useful, with which you need to wrap the pencil, pasting the resulting cap with corrugated paper. Paper should be taken in the same color as the base of the pen.
3. In addition to the pen, you can build a pencil and heartily congratulate the teacher.
Believe me, a gift for Teacher's Day with your own hands. it will be much more pleasant for the teacher to receive from the student than an expensive (financially) gift.
Please your teachers.
Teacher's Day is not the holiday for which you should give big gifts. However, it will still be right to make a postcard with your own hands for the teacher. Any teacher will appreciate the efforts of the student and will be truly touched. We have compiled a selection of master classes for you, in which you will find several interesting and unusual options.
All lessons are designed for independent work of students. That is, children will be able to make any of these postcards for the teacher on their own. No complicated materials or tricky explanations - everything is simple and clear. At the same time, the postcards outwardly still do not look primitive - the teacher will understand that the child tried.
We advise you to look through all the options and choose the best one. Consider your child's abilities. And not only creative, but also perseverance, attentiveness, readiness to perform monotonous work. If you have a fidget, it is better to do for the teacher a simple postcard, and not one that will have to tinker with for, say, half an hour.
quilling
In this technique, you can make a lot of different cards for Teacher's Day. True, this is an option for the diligent. Earlier we told you what quilling is. If you like how the postcard is made in this master class, check out this article. There we talk in detail about how to properly fold stripes into quilling figures - this is an important point.

We will need:
- colored cardboard;
- colored paper;
- quilling needle;
- PVA glue;
- any decor.
Quilling always has the same workflow. First you need to draw an image on paper or cardboard, and then roll up the required number small parts. Arrange them in the correct order, then glue one at a time.
On postcards for Teacher's Day, you can make small template congratulations. It is best to choose flowers as the main pattern. You can add a postcard with ribbons, buttons or school supplies templates.

Take a look at the suggested examples for inspiration, or come up with your own. If you are just getting started with quilling, you can take a ready-made stencil on a school theme, and then just fill it in with small, beautifully folded details.
Application
This postcard for the teacher is rather universal than strictly thematic. Its advantage is that it is very easy to perform. If you add congratulations, it will turn out just fine. By the way, such a postcard can be presented to the teacher in kindergarten on Teacher's Day - he also deserves attention on this holiday.

We will need:
- cardboard;
- colored paper;
- buttons;
- glue.
To create details, you can use colored paper or cardboard taken from the cover of something cute. For example, from an old notebook. If it has some patterns on it, it can be a good base for a postcard. Take a bird or flower stencil, transfer it to cardboard, cut out the image.
To make the picture on the postcard a little voluminous, you can stick a circle of thick cardboard on the base, and glue the template on top of it.
Add buttons to make your Teacher's Day craft even more interesting. And then add heartfelt congratulations.
With pocket
This voluminous homemade postcard will delight any teacher. It is immediately clear that they approached its creation with a soul, with all dedication. Just keep in mind that an exceptionally assiduous child will be able to make such a postcard - you will have to tinker here.

We will need:
- cardboard;
- colored paper;
- notebook sheet;
- denim;
- pencil, pen pen, ruler;
- decorative flowers;
- any decor;
- Super glue.
For this postcard, you need to take the most dense cardboard. It is better to glue two sheets together if you only have standard colored cardboard. Glue a sheet of decorative or colored paper on top of the cardboard. It should be 1.5-2 cm smaller than the base.
Then glue the notebook sheet. It should be 1-1.5 cm smaller than colored paper. If desired, you can stitch the blank with a decorative seam - this will give it a special charm.
Glue a denim pocket to the center of the card. You can remove it from old jeans and fit it to the size of the postcard. Or cut out of fabric (not even necessarily from denim) - you imagine the shape. Do not glue it on top - leave it with a pocket so that something can be inserted there.
Glue a small ruler and a pencil on the pocket. Add any decor that fits into the Teacher's Day card: it can be fall or school. To keep everything tighter, sew the decor directly to the cardboard. Just thread a thick decorative thread and tie a bow on top.
Insert a calendar into your pocket, circle October 5th. Put a piece of paper with congratulations there. If they don't hold quite well, add a paperclip.
This homemade postcard will definitely please the teacher. At first glance, it is clear how much effort was required to create it.
Pencils
This postcard for Teacher's Day is very easy to make with your own hands. But it looks so original that this is the last thing you can think about. It will take you only 10-15 minutes to make this option.

We will need:
- cardboard;
- colored paper;
- notebook sheet;
- worn pencils;
- sharpener;
- Super glue;
- stapler.
We make the basis for the postcard as usual: we glue a small sheet of colored paper onto the cardboard. The imitation of the blackboard looks very nice.
From notebook sheet cut out rectangles (approximately 3 × 5 cm). Make 3-4 leaves to simulate one notebook. Draw the fields with a red pencil, attach to the postcard with a stapler.
Sharpen 2-3 pencils so that you get nice long chips. From this colored shavings, collect the flowers so that you get bright petals. Stem - colored pencil. We attach them with superglue. Add some more pencils next to the notebooks.
By the way, making this postcard for the teacher is also good in the sense that in this way you can get rid of pencils that are inconvenient to draw with. And it is simple, and it is unlikely that anyone else will give such a gift.
lush flowers
A homemade postcard for Teacher's Day is most often an application with beautiful flowers. If you like this option, make it original: let them be voluminous.

We will need:
- cardboard;
- colored cardboard;
- buttons;
- PVA glue;
- any decor.
Cut out the base from colored or decorative cardboard. We glue it in several layers on top of each other. We form the front part of the postcard.
It is very convenient to make blanks for flower petals using a decorative hole punch or stencils. You can simply cut out the circles and then assemble them towards the center by making folds at equal distances. It is also very convenient to take a rectangular piece of colored paper, fold it like an accordion. And then collect in the center, straighten the petals and glue.
Apply such "petals" to the postcard in several layers, add buttons, any decor and the inscription "Happy Teacher's Day!".
You can decorate your homemade postcard with something else. For example, braid satin ribbon or pieces of cloth. Just do not use dry glitter: they are not very appropriate for a postcard to school.
With decorative frame
This video tutorial will help you make beautiful postcard for Teacher's Day, which is unlikely to be brought by anyone else. If you are looking for something original and discreetly solemn, this option is for you.
We will need:
- cardboard;
- colored paper;
- decorative rhinestones;
- glue.
Rhinestones can be replaced with satin ribbon or small star-shaped stickers (such can be found in the departments for creativity). You can also cut out small circles from colored paper with a hole punch - you get an interesting bright frame.
Volumetric postcard: school desk and board
Everyone will be delighted with this postcard: the teacher, the child himself, classmates. It is so original that it seems difficult to perform. In fact, you will spend only 15-20 minutes on it. Perseverance is not required here, but accuracy is useful.
We will need:
- cardboard;
- colored paper;
- markers;
- office glue.
Take a look at this video tutorial to make a postcard without mistakes. Everything is shown clearly and in detail.
By the way, in the same way, you can make congratulations for any holiday - not only to school.
We hope you enjoyed these master classes and your child has already chosen what he wants to make with his own hands for the holiday for his teacher. As you can see, all materials are available and almost every student has them. Add something of your own to these ideas, actively use stencils and create with pleasure. The teacher will definitely appreciate such works at their true worth!
Views: 7 523
Teacher's Day is important holiday in the lives of all teachers, and on this day, each student seeks to congratulate his mentor on significant date. How can you please a person who has invested his experience and knowledge in you? Today we present a selection of original handmade gifts. Most of them can be done without problems by middle and high school students, and for those who are only at the beginning of the school path, parents can help 🙂
Vase of pencils with flowers
You can also present the teacher with a whole set - a pen and a pencil.
Clock "Beloved teacher"

Watches are a very necessary item both at home and at school, because it is so important to know how much time you still have left to put knowledge into the whimsical children's heads. Therefore, we propose to make an original clock for the teacher.
You will need:
- frame from conventional wall clocks;
- a clock mechanism with arrows (if there is nothing left of an ordinary watch);
- stylized paper with a pattern;
- various office supplies;
- pen or marker;
- scissors.
We clean the clock board from old stickers and open it with a primer or white paint. You can also take a wooden blank. Just make sure it's the same size as the glass and frame.
We paste stylized paper on the scoreboard: for a mathematics teacher - in a box, literature and language - in a line, elementary grades - in an oblique line, etc. In the middle we beautifully write the name of the teacher, for example, "Valentina Ivanovna." You can also print paper with the name already written. We cover the finished workpiece with varnish on top so that the clock lasts longer.
In place of the numbers, we glue various stationery: paper clips, sharpeners, rubber bands, pieces of pencils, rulers, etc. Make sure that the objects fit exactly in the place of the numbers, otherwise the clock will not display the time correctly.
Install clock mechanism and hands. We place the scoreboard under the glass in the frame.
Everything, our gift is ready!
Burlap pencil

All school supplies should be in order, and a pencil box will help with this. A very beautiful and original organizer for pencils and pens can be made using burlap yarn. Let's find out how to create this miracle with your own hands.
You will need:
- tin can or toilet paper roll;
- yarn for burlap;
- decorative elements;
- glue;
- scissors.
We take a tin can or a roll of toilet paper. If you chose the latter, then you need to cut out the bottom for it from thick cardboard and glue it.
Lubricate the workpiece with glue and glue it tightly with threads. Burlap should be laid in neat, even rows. Make sure that there is not too much glue, otherwise the thread will get dirty and ruin the whole appearance pencil holders. Special attention give the edges of the jar: here the thread must be very securely glued, otherwise in the future all the burlap will come off the workpiece.
We decorate the glued jar with decorative elements: for the teacher, you can take various flowers, lace, braid, for the teacher, nuts, bolts and other male things are suitable.
Everything, the pencil box is ready! Such a gift will appeal to any teacher and will help keep his stationery in order.
Postcard "Beloved teacher"

And what a holiday without a postcard! We will make a gift for the teacher of each subject.
You will need:
- cardboard blank:
- clippings and printouts;
- decorative elements;
- stamps, paints, powder, contours, etc.;
- glue;
- scissors.
If you do not have a blank, but just a colored cardboard of a rectangular or square shape, then fold it in half. We stylize the blank with colored paper.
We decorate the postcard with various clippings, for example, for a computer science teacher - with computers, microcircuits, symbols of programming languages; biology - with flowers, diagrams with the structure of the human body; chemistry - cones, periodic table; foreign language- sights of the country, inscriptions, images of people; stories - architectural buildings, mummies, knights of the Middle Ages, etc. Be sure to glue the name of the object in the foreground.
Also, the card can be decorated with various additional elements- rhinestones, artificial flowers, ribbons, stickers.
We decorate the inside with the help of inscriptions, markers, paints and stamps. We write original congratulations with your handwriting.
Everything, our gift to our beloved teacher is ready!
Photo collage with congratulations

Photography is original gift that will leave fond memories for a lifetime. In addition, it is a beautiful piece of interior decor. A photo collage is the present that even the smallest schoolchildren can make with their own hands, of course, with the help of their parents.
You will need:
- big paper;
- photos;
- plywood backing;
- frame with glass;
- various thematic pictures;
- pastel colors;
- glue.
First you need to prepare: we come up with an original congratulation for the teacher - the number of words should match the number of students in the class; print out a congratulation - each word on a separate sheet; we take a photo of each child with one word of congratulations; print photos.
If the drawing paper is made of white paper, then we cover it with pastel colors. Don't take too much bright color, as it will distract attention from congratulations.
On a large drawing paper, paste the photographs taken in the correct order. It will be very nice if the photo cards are placed asymmetrically, i.e. one is lower, the second is higher, etc.
Empty spaces on the Whatman paper are sealed with thematic pictures from the printouts.
We give the photo collage to dry well and place it in a frame under glass.
All is ready! Such a gift will touch the soul of even the most strict teacher. Do it and see for yourself.
Hello! Very soon there will come a very important holiday in the field of education - Teacher's Day. It is celebrated according to the already established tradition on October 5th. On this day, we can finally legally express our gratitude to all teachers.
Therefore, it is important not to forget to prepare gifts for your favorite teachers on time. After all, there are not so many holidays on the calendar when you can thank the teachers for their hard work.
The most popular gift and sign of attention is a bouquet of flowers and a box of chocolates. But this is all very banal, although I do not argue that it is pleasant. Nevertheless, it is better to use this option when you completely forgot about the upcoming holiday and you don’t have time to make or buy anything else.
If you do not know what you can buy or make yourself as a gift, then you have come to the right place. Because this article is just a special issue, which will tell and show about all the presentations for this event.
After reading the post to the end, you will definitely decide on the choice of gift. After all, all the ideas of original and inexpensive surprises are collected here and now! The question of what can not and is not recommended to give will also be raised.
As always, I make a clarification to the fact that I do not make all home-made works myself, but I take ideas and photos from the Internet.
So let's get started. In order to stand out from the crowd and not be like everyone else, you need to try. And not just go to the store and buy something banal, but think carefully, find ideas for creativity and make something unusual, beautiful out of classic presents. This is what I will try to help you with.
For me, the best surprise would be a gift that includes homemade items. There is no need to do everything manually. You can simply supplement and decorate the purchased version.
Let's move from words to deeds. Look what works I managed to find. Everything looks super duper!
Instead of the usual bouquet of flowers, you can create this beauty. And everything is done in an elementary way. We bought a small basket with fresh flowers, cut out the centers and petals from cardboard and corrugated paper, glued photographs and the collective present is ready.

You can also make such a cake with surprises. It is made of cardboard, decorated as desired, and a gift is placed in each piece. It can be written wishes, sweets and small chocolates.

You can make a beautiful vase of colored pencils and give it as a gift filled with fresh flowers.

If you want to congratulate a music teacher, then here is a cool decoration of chocolates in the form of a piano. The work uses corrugated paper.

In order to congratulate all teachers and not spend too much money, you can buy or make gift soap yourself, then pack it beautifully.

Or do it yourself greeting card, and inside, instead of wishes, glue pockets in which you put a chocolate bar and tea bags. There will be something for teachers to do during recess).

More can be bought beautiful cups for drinking tea and coffee. Put the wrapped sweets inside. Beautiful and practical!

But what other crafts can be made from sweet presents. Looks impressive and symbolic. “A real desk” is such a creation and it will be a pity to eat.

Here is another version of a homemade postcard using the scrapbooking technique. If you own such technology, then why not work hard and make such a surprise.

See how you can decorate an ordinary box of Raffaello chocolates. Class!

Or make an Ekibana. I am sure that such a festive tree will decorate any teacher's table.

You can generally excel and mold the whole picture out of salt dough, for example, capture the faces of class students and the teacher himself, of course. Then paste into the frame. The picture is ready for presentation and interior decoration.

And speaking of sweets, here's another interesting ideas their designs:


As you can see, being original is not at all difficult, you just need to make a little effort and turn on your imagination, and everything will work out!
What can I buy and give to a teacher on Teacher's Day
Let's see what is worth our attention.
For women teachers, of course, we buy flowers, but let it not be a bouquet, but a pot of fresh flowers. Firstly, it is beautiful, and secondly, all the beauty of the plant will delight not for a couple of days, but for many years.

You can also buy and give any sweets. Or, for example, buy a vase, fill it with sweets and put everything in a wrapper along with tea or coffee. This set is also suitable for men. Do not forget about fruit compositions, it also looks very nice.

If you know the preferences of your teachers, then you can buy them a ticket to the theater or cinema. Let the teachers rest too.

An excellent idea in the role of a presentation is a set of stationery. A very practical gift.

Also take into account the profile of teachers and based on this, make appropriate surprises. For a geography teacher, choose a small globe, a map; for a physical education teacher - a whistle, a ball; for a Trudovik - a set of tools; and for professors in the field of literature and the Russian language - an interesting book, a diary.

Gifting photo shoots has become very relevant and fashionable, but you can already look at this on a budget. Or you can order a video about your favorite teacher and the whole class. By the way, it is better to make such a gift collectively, from the whole class. And yes, can you give a star? Also an original idea.

You can also buy and donate small household appliances, but it is better to make such a surprise from the whole class and not very expensive, otherwise our professors will not be very comfortable. Do not forget about certificates for a beauty salon, shops or choose a stylish wall clock.
DIY gift for a teacher
But as I said above, any present, even a store one, will become much more valuable if you put your own strength and skills into it.
That's why I found detailed wizard class on decorating a typical gift - a box of chocolates. Here's how you can transform it and hand it over to our professionals in any field of knowledge.

To make such a surprise you will need:
- a box of chocolates that opens like a book;
- several sweets in individual packages;
- corrugated paper different colors, including gold or silver;
- glue, scissors;
- toothpicks or short wooden skewers;
- double sided tape;
- thick double-sided colored paper or colored cardboard;
- satin or nylon ribbon;
- a piece of polystyrene or polystyrene foam;
- beautiful ruler, pen and pencil for decoration.

Work process:
1. First, take out all the candies from the box and cover it inside and out with golden crepe paper.

2. After pasting, return the sweets to their places, and inside you can stick a sheet of congratulations.

3. Now glue the tie ribbons.

4. Print beautifully the inscription "Cool magazine" and stick it on the cover.

5. Glue a 5x5 piece of Styrofoam to the bottom left corner of the box.

6. Cut out small strips of double-sided tape and stick them to a pencil, pen, and ruler.


8. Insert corrugated flowers into a piece of foam.

9. Additionally, make a decor in the form of autumn leaves and stick it on the box.

10. Complete the craft with any elements, such as rowan branches, ribbons, sparkles. And give to health!

Here are some more homemade ideas:


And to help you, there is also a video plot, which also contains ideas for homemade gifts.
What gift can be given to the class teacher from the class
I also want to note that if you are in primary school or most students want to congratulate their class teacher, then it’s better for everyone to unite and make a big collective present.
And here's what you can give in this case.
Here is such an interesting design of ordinary sweets.

What a great photo collage. Great idea!

Or here's how you can still order everyone's favorite box of chocolates.

You can order a painting.

Or make a stationery cake.

And you can bake a real one!

It is also very fashionable to make and give gingerbread in the style of the holiday.

Also, do not forget about those presents that were described above, such as a theater ticket or a gift certificate.
In any case, no matter what gift you choose, it must be neat, from the heart and with love! In addition to our dear teachers, do not forget to congratulate the educators. By the way, they celebrate their holiday on September 27th. And all gift options are suitable for preschool workers.
And before I end such a festive post, I will tell you about what should not be given to teachers. There is a whole list of forbidden gifts. Read it carefully so as not to be embarrassed.
What not to give on Teacher's Day:
- Money;
- Any gift with a price tag;
- Alcohol, even if expensive;
- Bed sheets;
- Cosmetics;
- Perfume;
- intimate gifts;
- Kitchen and bathroom accessories;
- Knives, forks, scissors;
- Cloth;
- Pet;
- Decorations;
- Sports equipment, except for a physical education teacher;
- Large home appliances.
Of course, there are no strict rules, but before you buy and give a gift, think about whether the teacher will be pleased to receive it and whether you will put him in an awkward position.
Actually, that's all I wanted to say. I hope you find the most treasured gift that will please any teacher. Don't forget the main thing, Teacher's Day is coming very soon, so don't delay choosing a gift!